<< Previous | Kitchen | Demolition | Cabinets | Countertop and Sink | Flooring | Next >>
Remodeling Our Kitchen - Demolition - June 2008
Finally!
After more than 13 years of making this house our home, we're finally getting around to remodeling the kitchen! We've replaced the carpet in the living room (and repainted it) twice already; remodeled the bathrooms, the bedrooms, painted the exterior, painted the interior, wallpapered the master suite, retiled the floors, even redone the patio and pool. Now we finally get to the kitchen, which has needed it ever since we moved in. The 'cheap' particle board cabinets have been missing laminate here and there ever since we bought the house on Halloween in 1995, and they've lost more of it over the years. Well, the wait is finally over...
Part of the reason we waited so long is we could never agree on whether or not to remove the old seventies style bulkhead drop ceiling arrangement; Ann wanted it to stay, I wanted it to go, mainly because of how small and closed in it makes the kitchen feel - not to mention all that wasted space! Through one of her contacts at work she found a 'handywoman', a Jaquelyn Of All Trades, and had her come out for a look to get her opinion and estimate its removal cost.
The 'handywoman', Quinci, takes one look at it and says she can't believe we still have it, considering how outdated it is... That's all Ann needs to hear, she won't take my word for it but the minute she hears it from a woman, it's God's gospel truth! I've been trying to convince her for years that ceiling needed to come out! Maybe it has something to do with the dozens of other 'unfinished' projects I have 'in progress'. But I digress...
Another reason we waited so long is we could never agree on whether to lose the 'breakfast bar' penninsula or not. We never used it for anything more than a countertop. We have a table and chairs in the 'breakfast nook' area, not bar stools, which would have been too tall for the 'bar' anyway. My concern is the loss of storage if we remove it without also removing the drop ceiling. Now that we're losing the ceiling, I have no problem losing the penninsula too, although I'm still concerned we're losing storage. We shall see...
The first step is to get the old wall cabinets out of the way in preparation for the demolition. Quinci asks if our son, Nick, can help, saying in doing so maybe he can learn a thing or two about the trade. He is excited to help so we can't say no. To save some money and some strain on Quinci's back, I agree to remove the wall cabinets the weekend before they start. That way she and Nick can begin the ceiling removal in earnest.
Removing the old cabinets and bulkhead ceiling - June 2008
Ann starts by cleaning out the cabinets so Nick and I can begin their removal. The cupboard next to the sink comes down first, then the wall cabinets on the other side of the sink next to the refridgerator. We jockey the contents of each cupboard to the counter and back again as the cabinets come off the wall and are set on the floor. Ann 'culls' the coffee cups and glasses we don't use anymore and now those left share a single cabinet.
Next I have to take down the microwave, mounted beneath the wall cabinets over the stove. The spices and seasonings in the cupboards on either side go into cardboard boxes for easy access later when cooking. The cooking bowls, strainers and such go on the counter for now as we remove the large, over the penninsula cabinets. All that remains are the cabinets over the stove and refridgerator, but they are soon on the floor too.
By now we're running out of room for all these cabinets and looking for a way to consolidate more. The cabinets with all the plates, bowls and casserole dishes go on the floor along the long wall by the pool at the end of the kitchen. The cabinets from over the penninsula go right on top. All their previous contents are returned to them. The set from over the stove goes under the plant window shelf together with the refridgerator cabinets. There! All done! Now the real work can begin...
<< Previous | Kitchen | Demolition | Cabinets | Countertop and Sink | Flooring | Next >>
And so it begins...
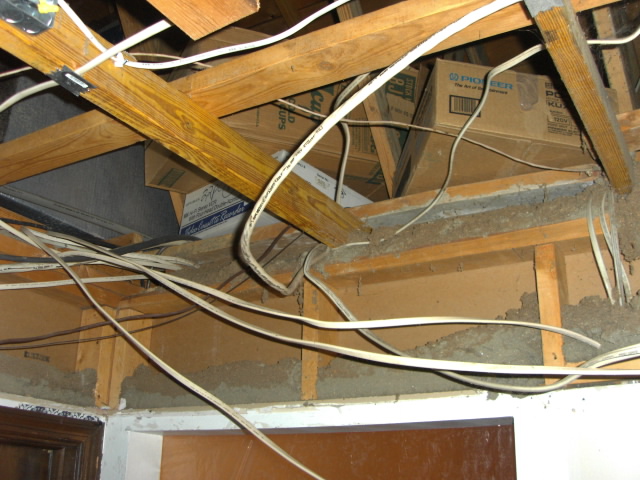
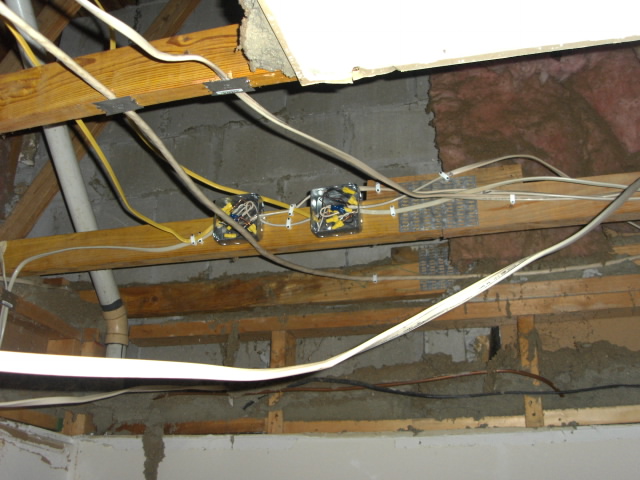
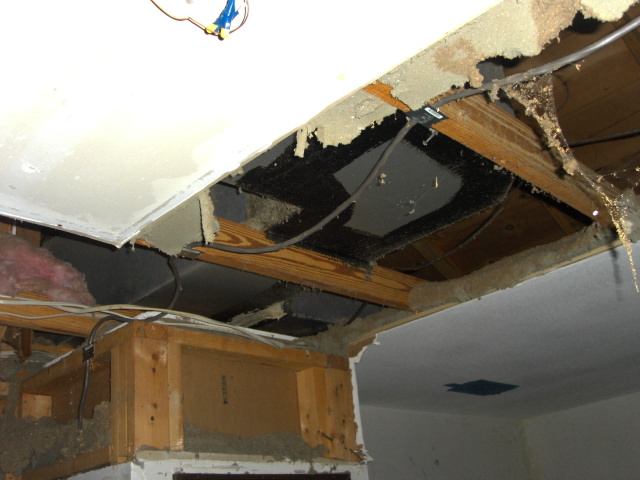
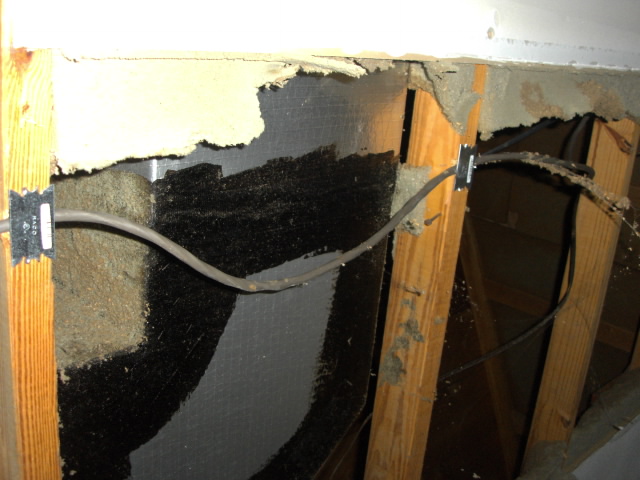
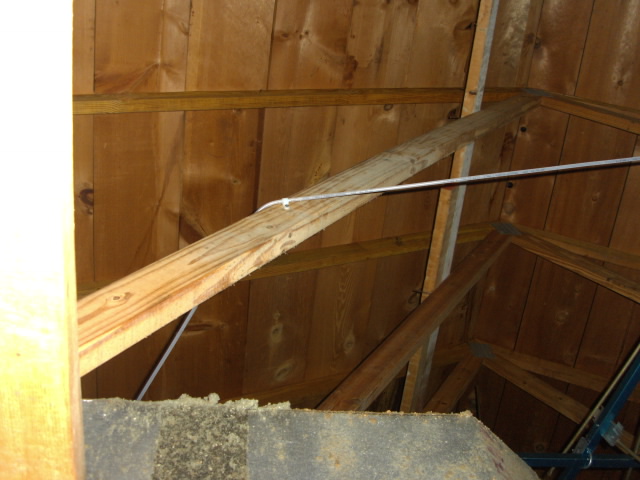
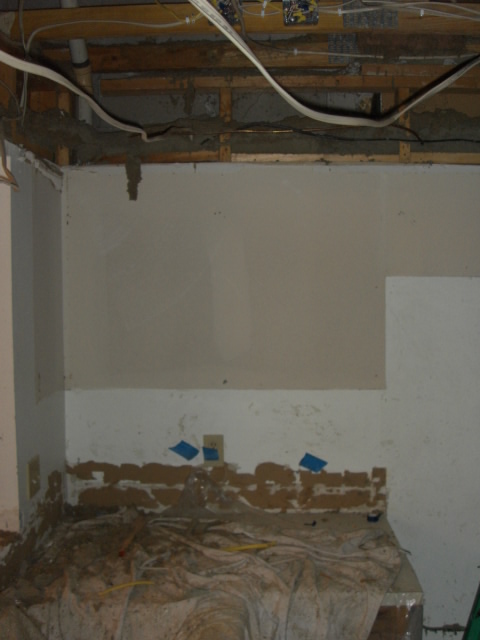
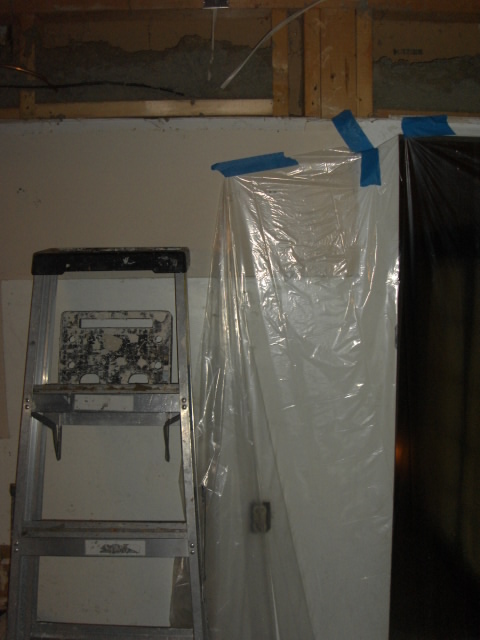
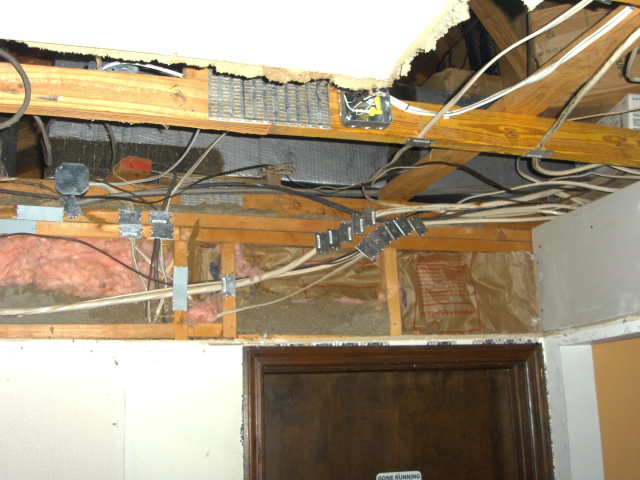
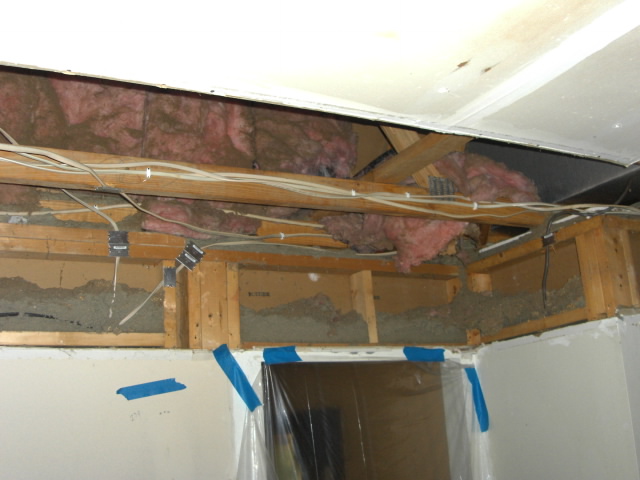
Quinci shows up and starts by covering everything and taping up some plastic sheeting over the door openings to help control the dust. We find out the hard way it doesn't, but I'm getting ahead of myself. I get to work from home just in case they need my help but I trust the two of them will get things done without it. Nick enjoys tearing out the drywall but the dust from the 'blown' insulation is just a bit too much even with a mask. They are bagging the insulation to be able to reuse it once they're done with the new ceiling. I'm back and forth to the kitchen for a coffee refill and periodically 'check' their work. They have most of the old drywall out of the way by lunchtime, but I'm already beginning to see there's a problem... Just what I feared, the electrical wiring isn't done to code, like everything else in this blasted house! I don't say anything and wait for the inevitable...
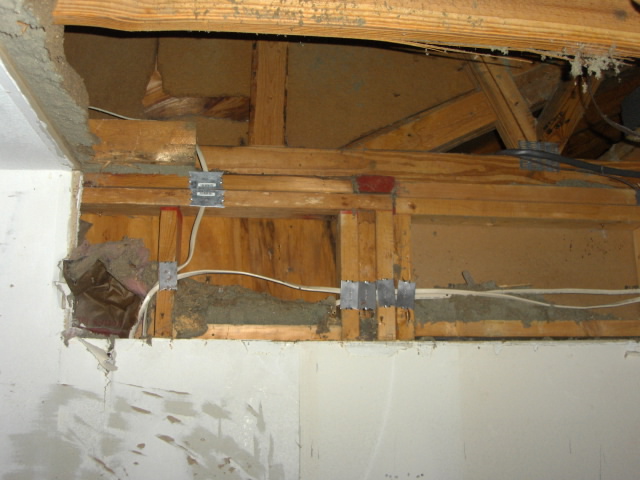
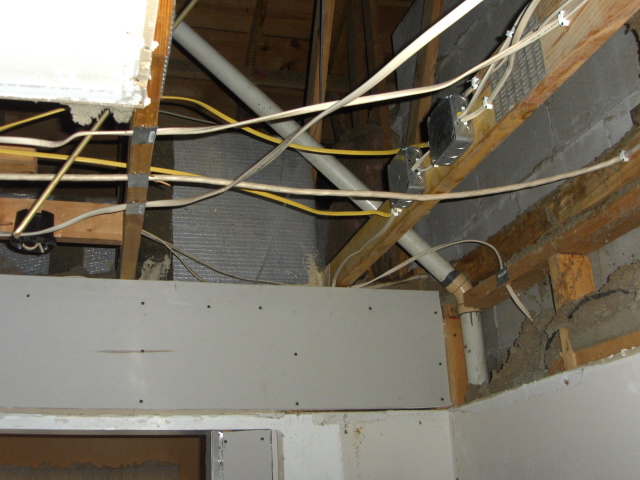
Soon enough Quinci yells down the hall for me... Guess what she wants to talk about? That's right, rerouting the electrical wiring is going to take more time (and money). All that dangling wiring should have been routed over the rafters and the wall top plates should have been drilled for the wiring to pass through them! Oh well, shoulda, woulda, coulda... It just means it's going to take longer and cost me more money. Quinci had asked before we started if I thought the wiring was draped over the rafters or not. I told her to expect the worst if it's anything like the rest of the house. Turns out I was right. So now we have a choice, rewire the kitchen from new electrical boxes, as it should have been, or just notch the rafters and studs and use nail guard plates to protect the wiring. My understanding is nail guards are really meant to protect plumbing that runs through the studs behind the wall, not wiring which is meant to be stapled to the side of the stud, but what do I know?
The real work begins...
Normally I would say do it over from scratch, but with the price of copper to the point where people are stealing it from air conditioner coils, electrical boxes and nail guards look less expensive. Someone even tried steal the Jeep's radiator that was just sitting next to the garage! This guy rang the doorbell to see if anyone was home first. Nick was out on the patio cleaning the pool and couldn't get to the door in time, so Nick just watched him through the windows, and noticed him acting suspiciously . The guy looked around to see if anyone was watching, then picked up the radiator and started walking away with it. Nick walked out the front door and asked him, "Can I help you?" The guy quickly dropped the radiator behind the Jeep and asked if we had any car batteries we didn't need... I rushed home when he instant messaged me about it, but I'll finish that story another time... We're talking about the kitchen now.

More work...
I have to head into work after the first day so Nick and Quinci are on their own. At least two extra days, another box of 14/2 wire, most of the rest of my box of 12/2, a ten foot chunk of 10/3, many new work electrical boxes, wire splices, 'staples' and nail guards later, the electricity to the kitchen is restored. Looking back I wish I would have just had her run new wire, since she had to splice pretty much everything anyway, but I can't really justify it with anything but a 'perfectionist' desire to do it right. The cost really doesn't matter, it was going to cost more regardless of how she did it, at the time the real motivation is the gigantic open air access to the attic and the increasing filth from blown insulation accumulating in the rest of the house. I just want that huge, gaping hole into the attic closed up! Running all new wire would just take that much longer to finish.
Upgrades and improvements...
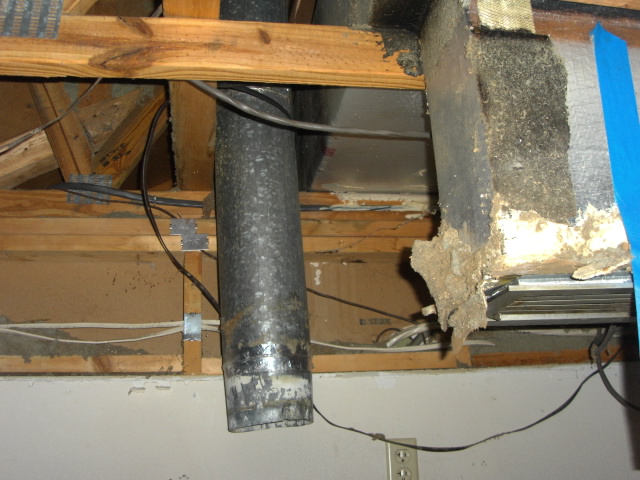
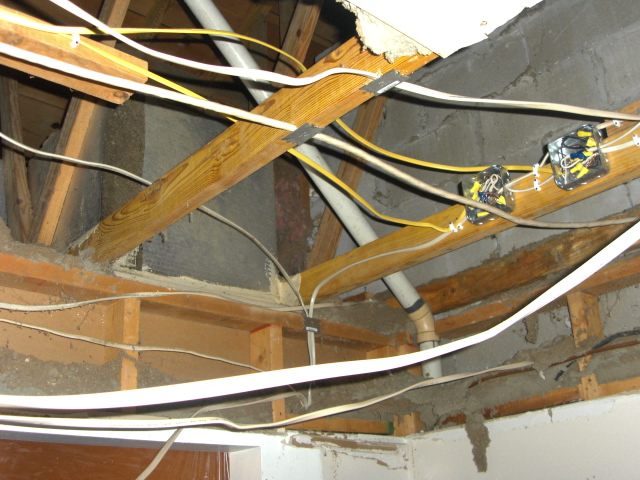
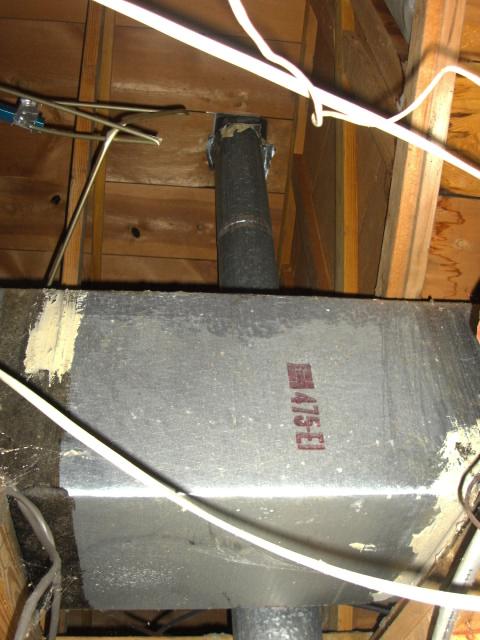
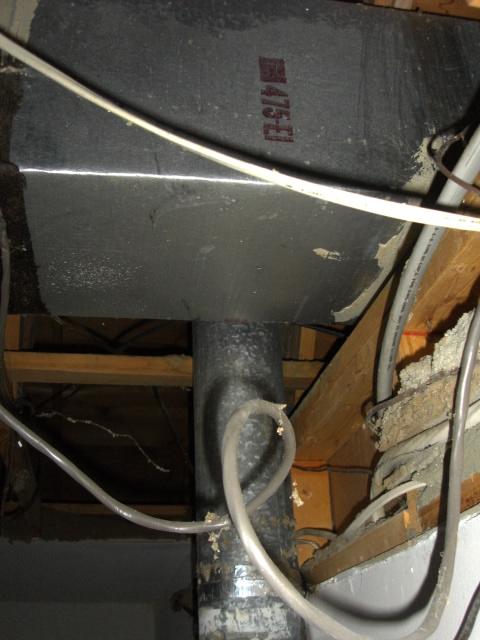
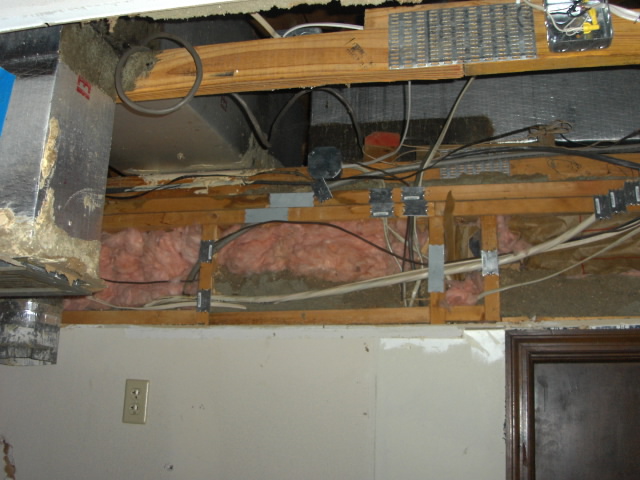
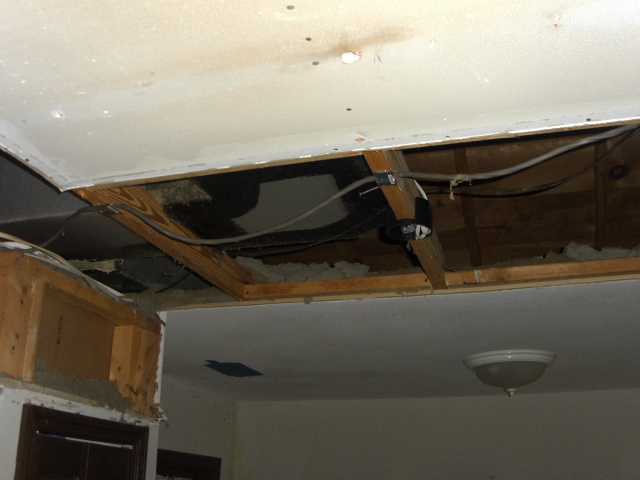
Quinci asks how we want to handle the electric from the old recessed lighting where the existing drywall (and wiring) are still in place. She and Nick had already removed the rest of the original framework studs and drywall. We decide on two equally spaced electrical boxes, one for a new ceiling fan in the center of the new kitchen work area and one for a light fixture in front of the existing pantry. I ask her to run an 'always hot' for the fan, separate from the light switch circuit. She kind of looks at me cross ways, so I explain to her that way we can leave the fan running independent of the kitchen lighting being on - one (always on) circuit for the fan and one from the wall switch for the light kit. She is also concerned about better securing the 7" ventilation 'pipe', running to the roof, from what used to be the range hood in the microwave. I asked her and Nick to remove that last section, 'unlatch' it so it lays flat, trim it to fit nearly flush to the ceiling, then 'relatch' it and attach it. It doesn't get done...
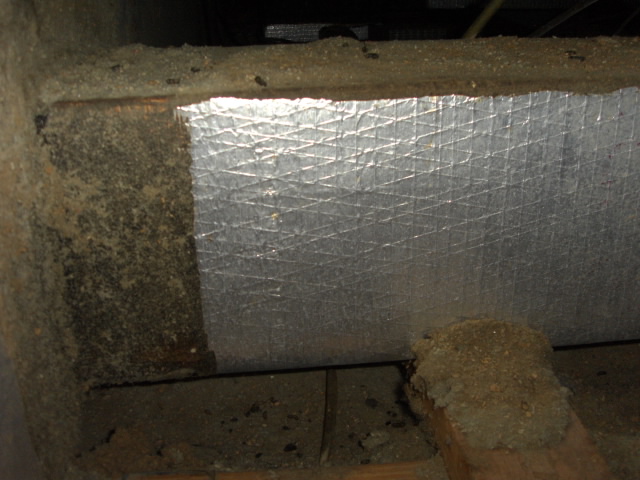
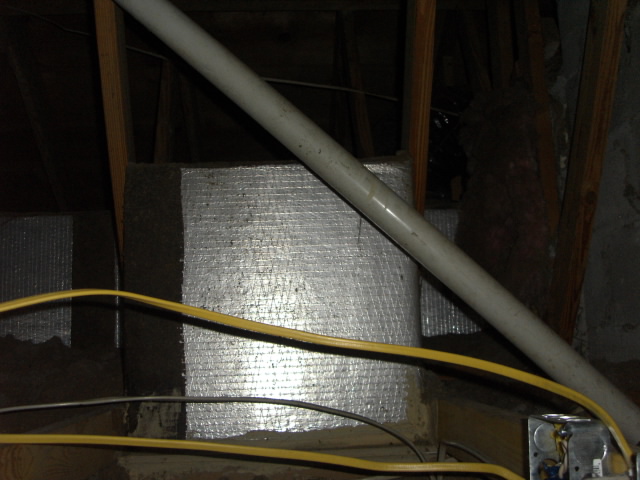
Remembering the new refridgerator water line placement...
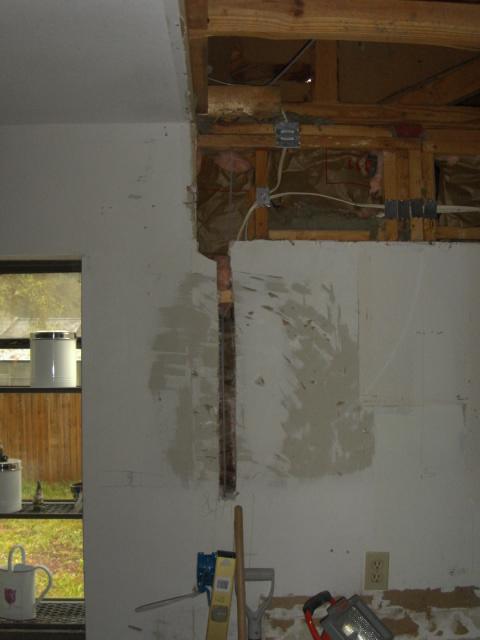
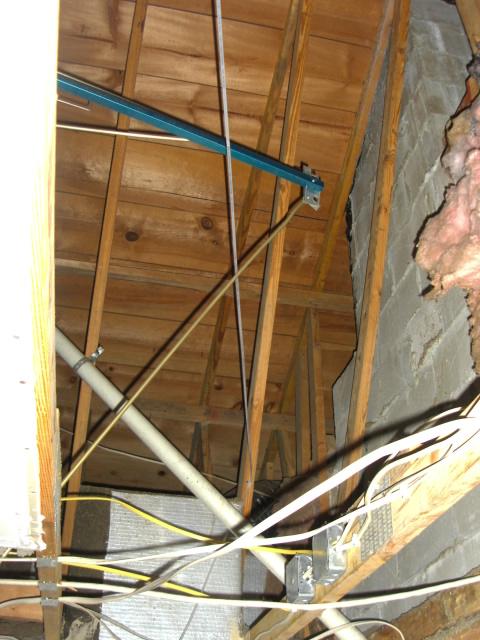
By now we've decided to move the refridgerator across the kitchen to where the penninsula won't be, so I figure while we have open access to all the walls, let's put in a new copper water line while we're at it. I give Quinci some more money to buy a coil of flexible copper tubing, but she comes back with plastic tubing, WHICH I DO NOT TRUST! But I don't know it until I get home from work and Nick has already installed it. I can't be mad with him but I'm still VERY CONCERNED it's going to dry out, crack and fail, soaking all that nasty insulation to where it caves in the new ceiling and ruins the new cabinets and everything else! Time will tell... While I was at it, I got some ductwork pics but there isn't much in the way of 'landmarks' to show where the ducts really are.
New drywall, but first...
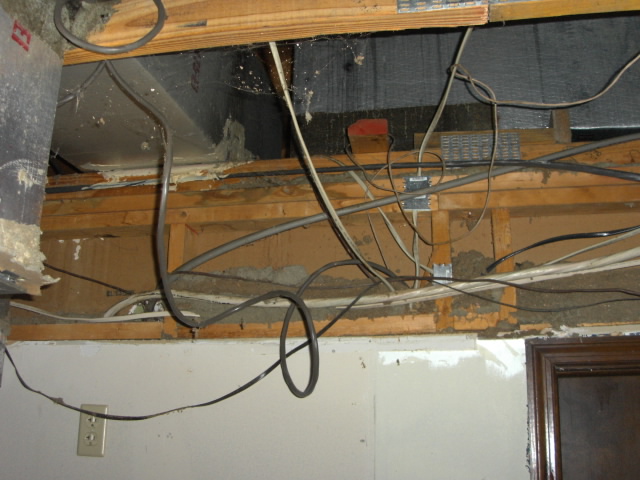
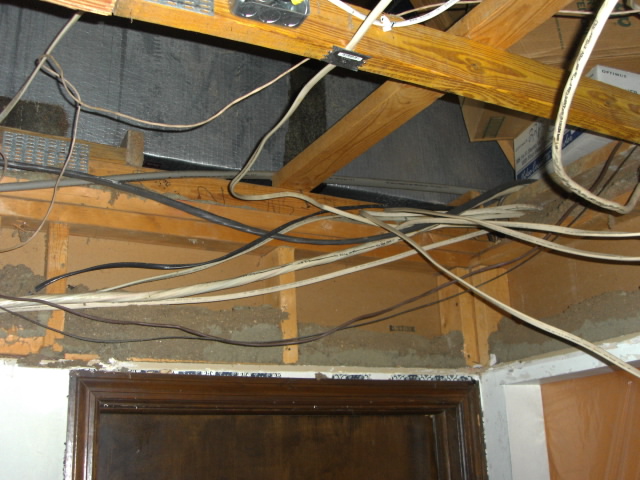
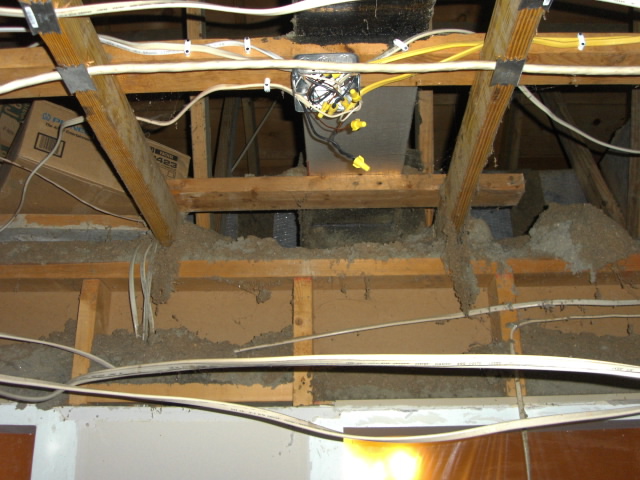
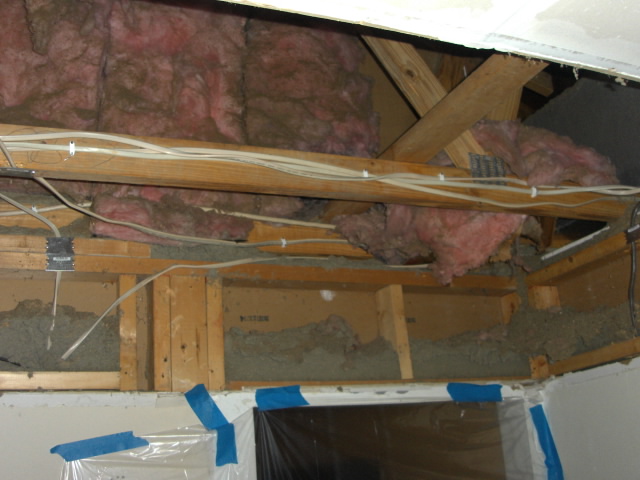
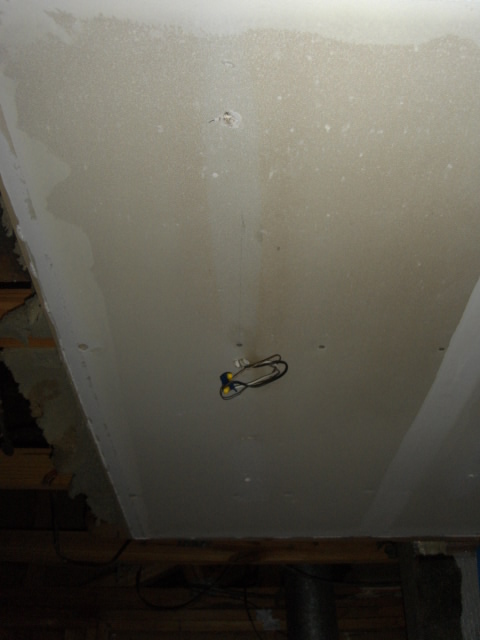
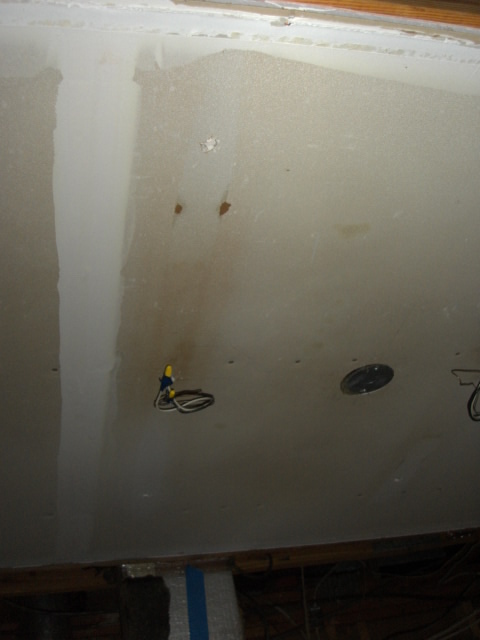
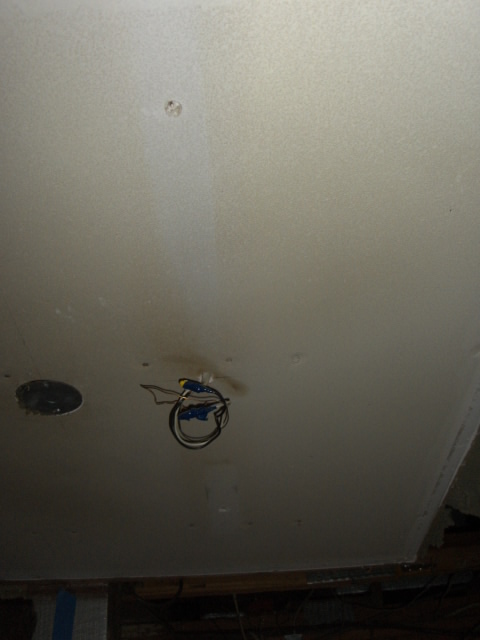
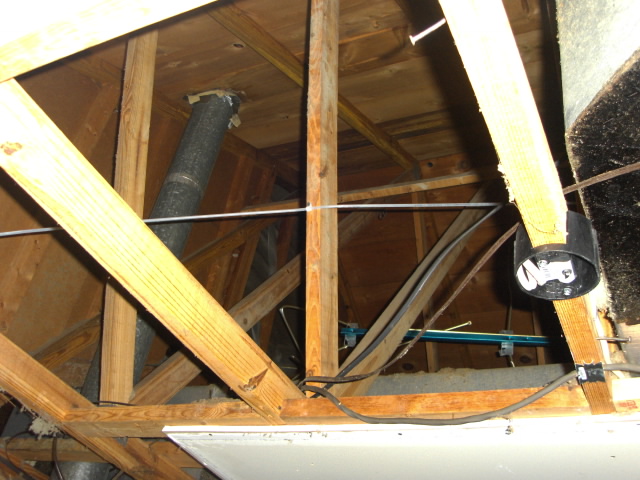
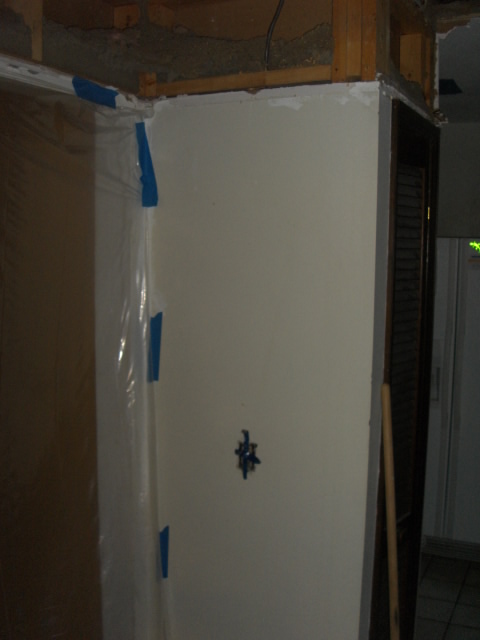
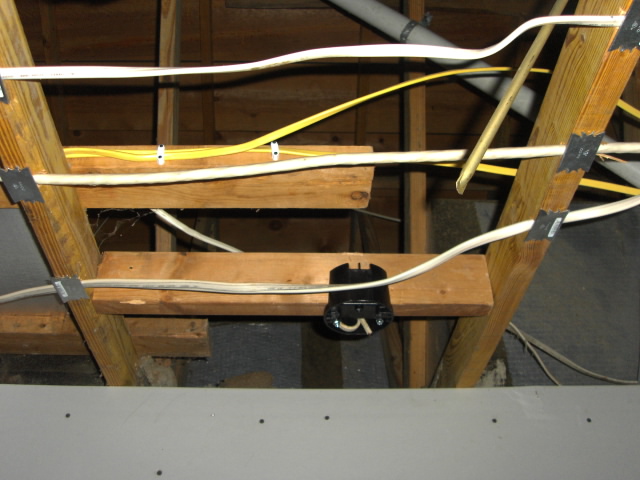
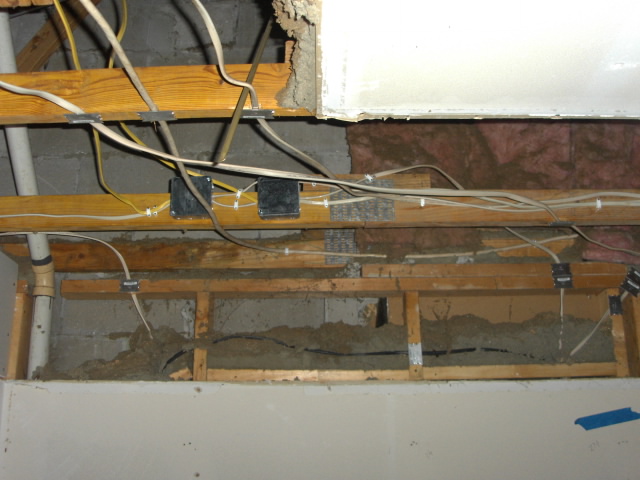
Once all that is done, they start to add the 'nailers' they will need to hang the new drywall - short lengths of 2x4 to give support to the drywall, something to nail the edges of the drywall to. Quinci reminds me I may want to get some placement pics while the walls and ceiling are still open, so now would be the time since next week she and Nick will be installing the new drywall.

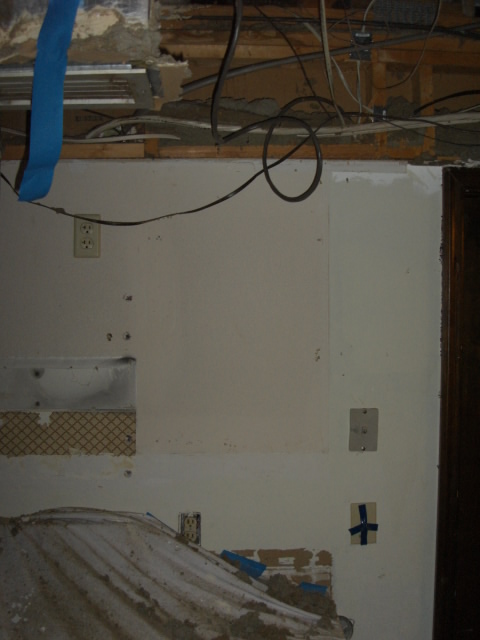

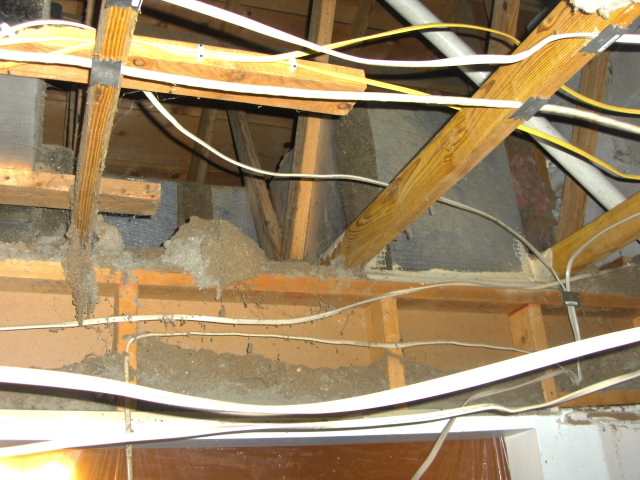
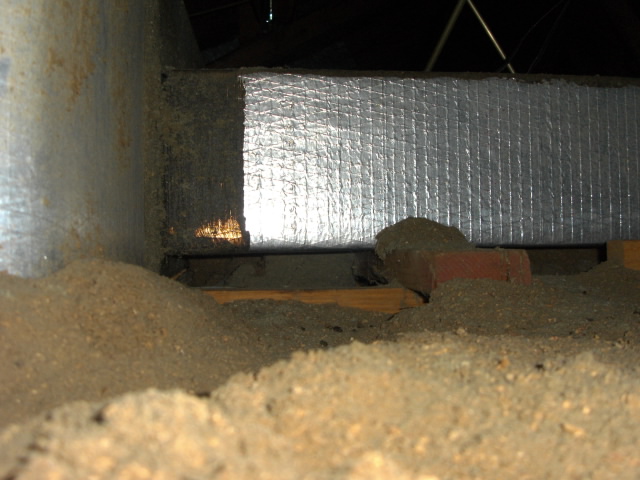
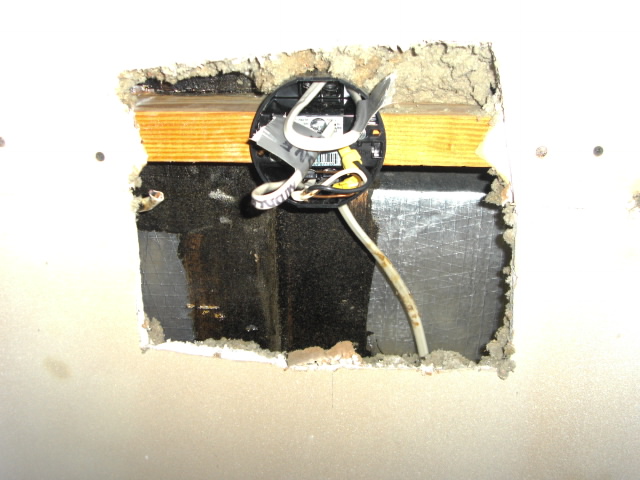
Remembering the nailing guard placement
A new week is here and they start to add the drywall to the east wall over the sink. I already snapped some pics earlier last week, but it appears some of the nailing guard placement has been updated... I seem to remember Quinci saying she ran out of nail guards and had to pick up more. She must have held off notching in the rest of the wiring until she got them. Before they get much more drywall in place I take another round of pics for future reference, and in hindsight, boy am I glad I did!
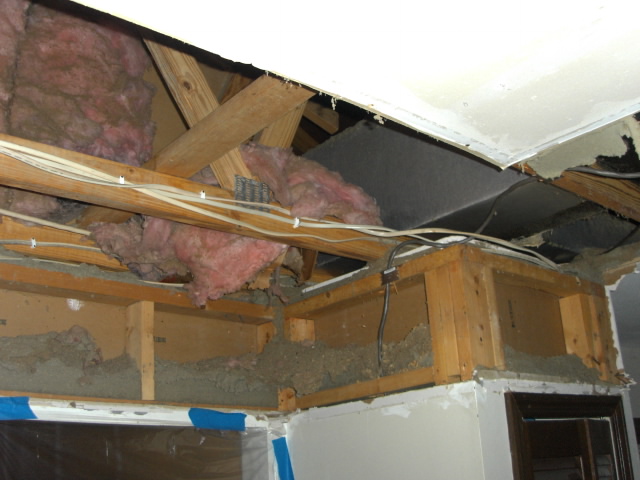
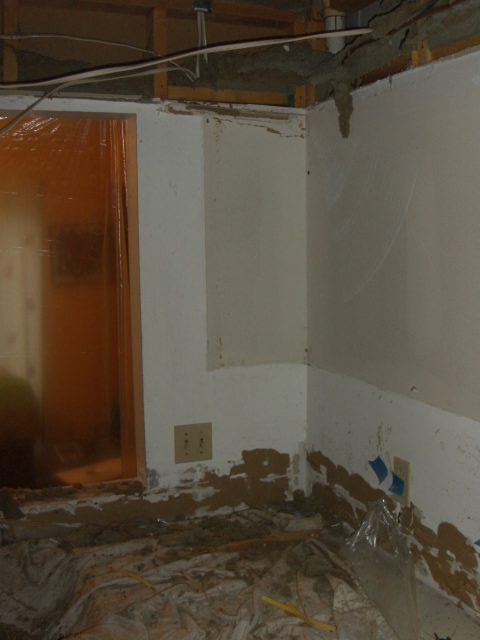
A new ceiling?
While I expect them to just add new pieces to the wall, I'm not prepared at all for the sight I'm greeted with when I get home. I expect to see new sheets of drywall on the ceiling, but... I'm not real happy with the way she's doing it, just piecing together old and new drywall instead of just hanging entire new 4x8 sheets. She says she's trying to save money but it seems to me that the extra time and labor cost of taping and mudding and sanding would more than match the cost of new sheets of drywall. Whatever. As long as it's getting done. The mess just keeps growing to the point where the garage is now a disaster too and the motorcycles are all covered in a thick coat of dust and dirt.
By now Nick has stripped off most of the remaining wall paper, but there is still some prep work to be done before Quinci sprays on the orange peel texture, so that waits until the next day. With the prep work finally done, Ann picks out some matching paint and has Quinci paint the now finished walls and ceiling. It's finally looking good, although the bill isn't... It ends up costing almost twice the estimate, which pretty much taps me out. To be fair, we did ask her to do more than was on the original estimate, but I am never so glad they are finally done!
<< Previous | Kitchen | Demolition | Cabinets | Countertop and Sink | Flooring | Next >>