Our 2018 Kitchen Rennovation To The Nest
<< Previous | Kitchen | Demolition | Plaster '70s Wall | Plaster Cabinet Wall | Wall Cabinets | Sink Cabinets | Plumbing | Plaster Sink Wall | Flooring | Cabinets | Countertop and Sink | Finishing Touches | Next >>
(Friday, 1 June 2018)
Counters get installed today! Yay! I am busy doing all the last minute things I've been putting off all week, like
attaching the beauty panel to the penninsula cabinet, removing the sink, installing the cleat behind the stove, etc.
That's of no concern to Brigel. I decided to swap the disposal mount from the old sink to the new one, just in
case they say it's okay to mount it on there when they install the sink. The concern is the sealant they use between
the sink and the countertop should not be disturbed for 24 hours. I think just twisting the disposal locking ring onto
the mount shouldn't be that much of an issue, and that way I can just finish connecting everything up, even if we can't
use the sink until tomorrow. Maybe it's just the extra added weight? I guess we'll see...
So Ann texts me to let me know they'll be here in around 15 - 20 minutes, about 10:00 AM. I just finished installing the mount for the disposal and head to the kitchen with it when I notice there is a Kraus maker's mark on the sink and I've installed the Insinkerator logo backward to it... Great. I have just enough time to take it all back apart, add more plumber's putty, and reinstall it correctly. And I mean just enough time. I'm just taking off the nitrile gloves when they arrive. I set the sink back on top of its box and meet them at the door, after I corralled the dogs in the back and closed the hallway door that is. They barked the whole time the guys were here...
They start around the stove, pulling it out onto the newly finished floor, and stupid me had just put the masonite away that had been lying on the floor in front of it! Great. Well now I don't have to worry about it making any (more) marks. I can tell they're having problems getting the tops for the cabinets on either side of the stove to fit right. At least it seems that way with all the pounding and manhanding they're doing. The one to the left of the stove gouged the wall paint in more than one place. I'm really scratching my head on this one. The guy that came out to measure had all that "space age" laser and digital camera and computer magic and this is how bad the fit is? I'd rather have the old school plywood templates at this point.
I guess they knew something was up as well, but moved on to the top for the sink, asking me if I had the sink handy and whether I'd be reusing the faucet. I told them not reusing the faucet, both the sink and the faucet are new. It takes both of them, struggling, just to get that one in place. Once it's sitting on the cabinets, it only takes a slight shove to sit it in its final position. One guy goes back to the stove side while the other starts to install the sink and backsplash. He shows me how badly the wall plaster is bowed, making sure I'm okay with all the caulking he'll need to use just to fill the gaps. I tell him I knew the plaster on that wall was far from flat and that was expected.
Shortly after that, he asks me if I've changed anything about the stove or cabinets on that side. I tell him no, the stove is still 23½" wide and the opening is still 24" wide. The only thing different is the cleat I added since the guy that did the measurements said I would need one there. Now I know there must be something wrong with the stove side. He points out to me that the measurement for the piece to span the opening behind the stove written on the sheet is 23½", not the 24" that the opening actually is. I tell him again, the stove is 23½", and it calls for an opening of 24"...
So now I'm thinking about how the guy that came out to measure had point blank asked me directly if the stove could come out from the a wall a little more, saying that there would be a piece that went behind it and it would be all one piece along that wall too. I wondered if that wouldn't be too fragile to make as one piece, but didn't really think any more about it at the time. After all, he knows what he's doing... Right? Wrong!
When I told the guys what that he actually pulled the stove out and explained it would all be one piece, they both tell me it wouldn't be strong enough to make as one piece. I told them I noticed the sides along the stove appeared to be unfinished and I was wondering whether there was something going on there. One of them tells me the guy that did the measurements said he thought the stove had a separate cook top that would be sitting on top of those pieces and would hide it, that's why they hadn't been radiused... Guess I should have questioned the guy more about it at the time.
If nothing else, this remodel has certainly been a learning experience. I've learned to trust no one. I've learned to question everything. I've learned that I suck at plastering and I don't know how anyone could do that for a living and not lose their mind! I've learned that trying to maintain age old construction techniques requires a lot of research. And practice. And even more time and money than using modern materials and techniques. But I've also learned that the materials of the time will outlast me, unlike modern materials that are lucky to last 20 years.
Probably the most difficult question they asked is where I wanted the holes for the faucet... For me it's a difficult question because I've agonized over whether I should just have the squirter sit 4" away from the faucet or 8". The standard openings are 4" apart, with the hot control to the left of the faucet and the cold control to the right. If you want a squirter or a filtered water spigot or anything like that, it would sit another 4" from the controls. The new faucet is the single post style with a single control built in, so it doesn't need the holes on either side. It does come with a plate to cover existing holes, but doesn't require more than the one hole in the middle. 8" it is. Done.
It's a two man effort when the holes are drilled. One holds the vacuum while the other does the "drilling". I looks like tehy shield the drilling action by placing a piece of plastic pipe around the "drill bit" tool. Since the countertop is supposedly made up of recycled glass, I imagine it's to stop shards and fragments of glass from flying everywhere when the hammerdrill "spins up" and pounds it with a diamond tipped hole cutter. It also looks like they wet it with something from a spray bottle. I'm not sure if it's a lubricant or just used to control the dust. Maybe both? Dunno. That's why we paid the "professionals" to do the work. If anything isn't right or gets broken, they'll take care of it...
<< Previous | Kitchen | Demolition | Plaster '70s Wall | Plaster Cabinet Wall | Wall Cabinets | Sink Cabinets | Plumbing | Plaster Sink Wall | Flooring | Cabinets | Countertop and Sink | Finishing Touches | Next >>
So now the "professionals" need to remake those pieces for around the stove because the measurements were wrong. That's okay though, the new countertops look wonderful and are much easier to clean than a chunk of ¾" furniture grade plywood! In any case, they finish up and ask me if they can leave the two backsplash pieces here for next time. I tell them sure, thinking I didn't want to have them forget to bring them back next time. Or worse yet, broken. They end up "lightly" attaching the long piece behind the stove, and I stash the short piece that goes along the other wall under the sink.
I ask them aren't they going to install the new faucet? I'm told no, they don't do that because they would be responsible if they broke it. Well, there's another thing the measurement guy told me that was wrong. I asked if I needed to wait to do that, like they said about waiting on the sink, and they said it was okay to install it now. So I figure the guy just got finished up mounting and cleaning up the sealant around the sink, how much harm could it do attaching the disposal? After all, the sealant is still pliable, and it's not like the sink isn't already tightened down.
Besides, it's not like twisting that mounting ring onto the mount is going to move or disturb anything that hasn't just been disturbed or moved. Plus how am I able to install the new faucet when I could potentially move the sink in doing do? I'm thinking the warning not to use the sink is so as not to get the sealant wet, not so much not to disturb it. In any case, I'm installing the new faucet...
As I'm looking at all the parts, I have one black plastic ring leftover, and I can't figure out where it goes. Mistakenly, I decide to go ahead and install the faucet anyway, only to find the spout won't turn without spinning the entire faucet. Guess I found out the hard way where that f...ing piece of plastic goes. Right. Between. The. Two. Halves. I have to take it all back out and remove the lower half, just to put that silly ring in place between the two, then repeat everything I've already done just to get back to where I was. But at least this time when I tighten it down, the spout moves independent of the rest of the faucet.
Let's get those supplies connected and see about flushing out the lines. I really want that ice maker and fresh filtered water back online today. I twist off the aerator first, knowing I'll forget to do it if I wait until after connecting the supplies. So that much is done, and I almost forget to connect the "squirter" before opening the valves! Guess I shouldn't have worried so much about that aerator and paid more attention to getting things installed before getting the supplies connected. The pass through for the squirter is definitely a two man job, but I do the best I can by wedging my finger in the hole in the pass through and tightening the plastic nut with my other hand. Good enough.
I can get someone else to help me hold it down while I tighten it up later. I pass the hose for the squirter through it and connect it to the faucet under the sink. Now I can turn on the supplies and... Wait a minute. I'll need the disposal and drain installed before I can run the water. With a quick twist of the locking ring, the disposal is in. Now to see if the drain is low enough or not. This will be the first time I've tested it. Nothing like waiting until the last minute! I soon discover that not only is the drain low enough, but I only need to remove about ¾" from the 6" extension?
Turns out the countertop is only about an inch thick, but has another inch "border" around the underside to make it taller. It appears to be more massive than it really is. When I calculated where the bottom of the sink would be based on undermount, and ¾" beneath the top edge of the cabinets for whatever reason, it put it a lot lower than the existing drain. With a 6" deep sink sitting ¾" above the counter, it was barely tall enough to make the drain. I figured another inch and a half plus the extra 3" for the new 9" inch deep sink meant the drain would have to be at least 4½" - 5" lower than the existing one.
Even though the old sink rim sat on top of the counter, with the extra inch border of the new countertop, the new sink rim actually sits about the same height as the old one did. So the difference in height is only about 3", not the 6" I made allowance for in the new drain height. It matters not, but where the old sink required nearly 5" of the drain extension to make the trap, the new one has it more than fully seated, which is why the extra ¾" needed cut from the extension. The trap has a 2¾" allowance, and now that we're 3" lower, the part of the 3" that didn't fit needed cut off.
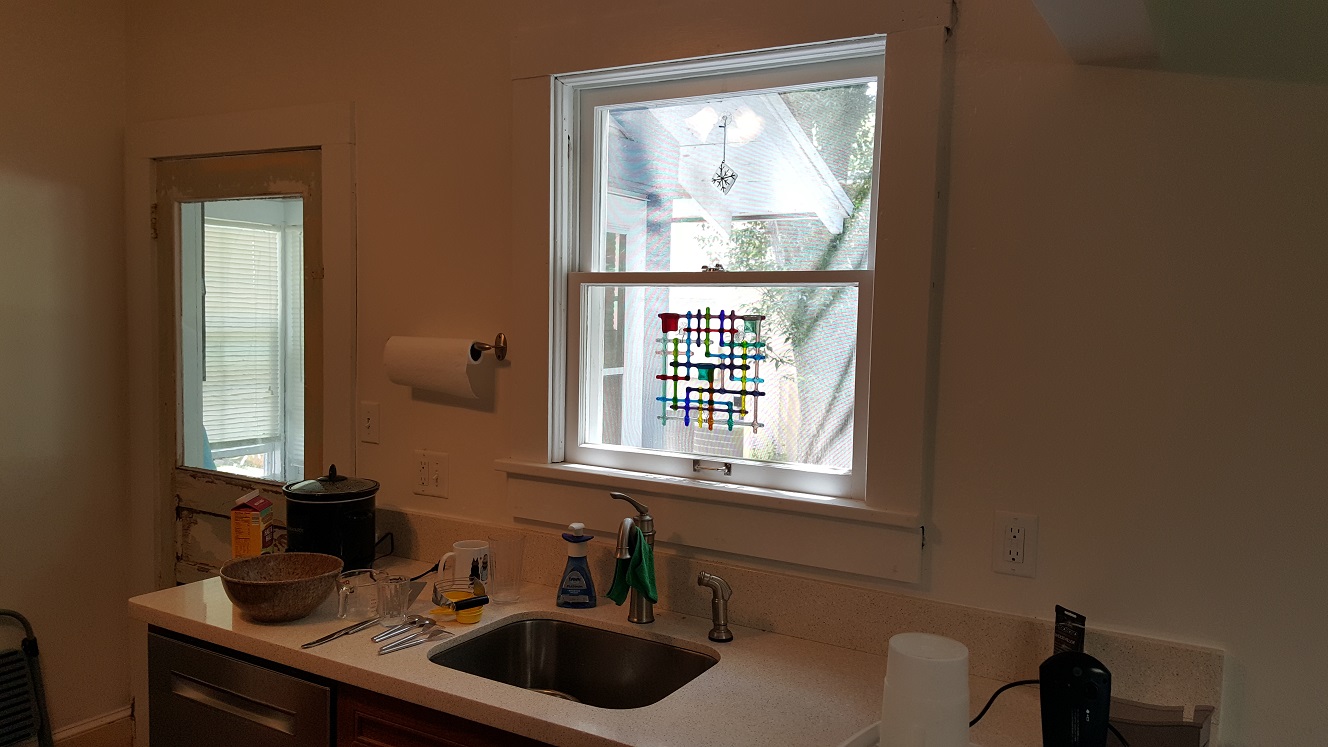
Now I can turn on the water and bleed the lines. It takes about ten seconds or so, but it finally stops chugging and spurting and starts to flow normally. I turn off the faucet, screw the aerator back on, and test again. Nice. And this new faucet feeds directly, nearly silently, into the center of the drain. Very nice. I don't want to push my luck and turn the faucet back off. I wipe the sink down with some paper towelling and hope I haven't ruined the sealant. I periodically check for leaks, but find none.
(Saturday, 2 June 2018)
I am taking a break from all of this remodelling insanity! Or am I? I do manage to get the switch box on the '70s wall
changed out for the kitchen light. It will need some more plaster built up around it, and I had to make a couple of "shims"
to back up the ears on the new box so I could tighten it. Ann decides that she can't wait for me to do the dining room and
hall plaster work and buys an oversized switch cover for it. It still doesn't hide it all, but it's much better than the
normal sized one. There! Now I'm done.
(Friday, 8 June 2018)
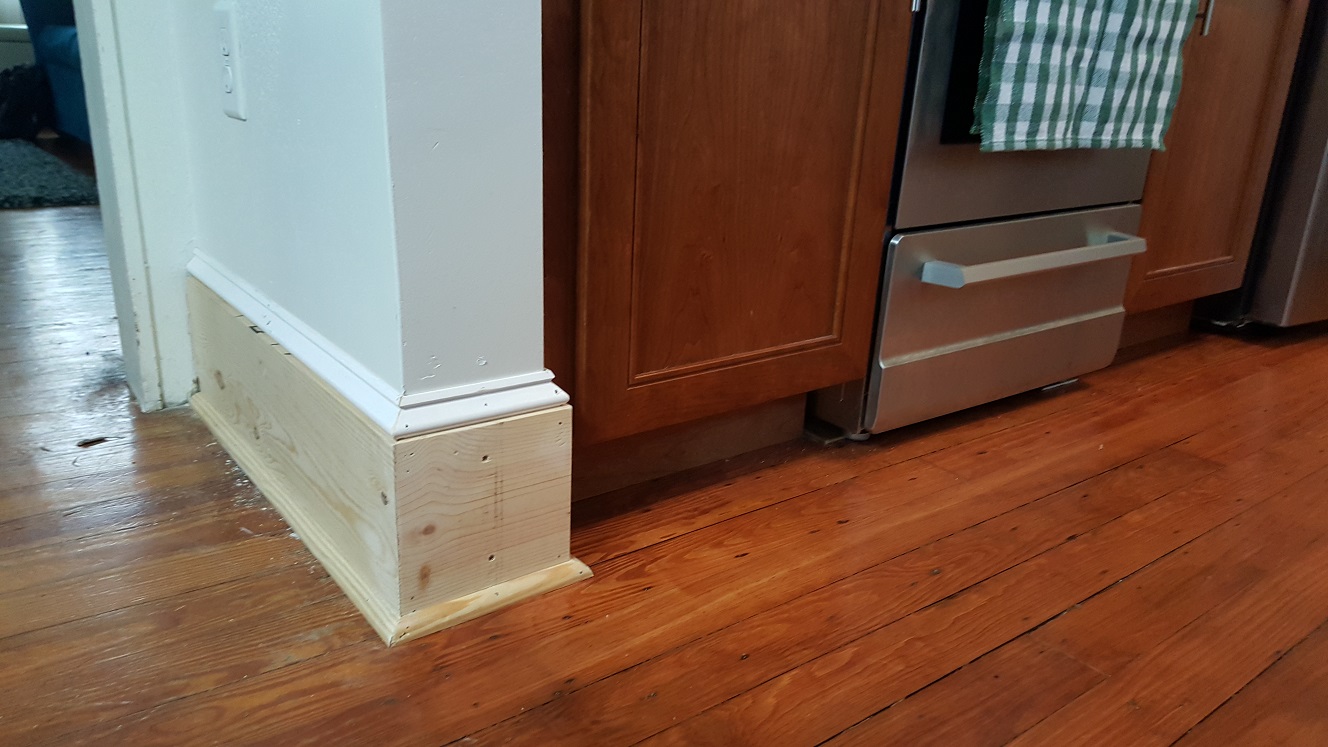
Managed to get the baseboards and moldings cut, at least for the long, straight sections on the '70s wall and the hallway.
The "wrap around" sections from the dining room into the kitchen will have to wait. Nick let me borrow his sliding chop
saw that will handle the 1x8s, but for whatever reason, I'm having a hard time trying to get it setup to cut the 45°
angles. I'm not sure why the slide is interfering with the fence, but it won't allow the saw to fully seat in the 45°
position and my cuts are not closing when fitting the parts against the wall. The wall itself may not be exactly 90°,
perhaps a bit more than that, making it difficult to fit the pieces even when I control the angles on my table saw.
I mark where the various pieces need cut, including the long "beauty" piece for the 8' tall pantry, and make it happen. Great. Forgot to take one of the pieces out to the garage with me. Guess I'd better get used to a lot of trips back and forth to the garage on this one. I end up cutting the 1x8s for around the corner from the dining room too short. Adding insult to injury, my table saw blade will only lay over to 45°, not the nearly 48° I need to make those corners fit.
For the base and cap moldings I can use my miter gauge to set the angles I need, but only in one direction, unless I want to have to resetup the tool every time I need to cut in the opposite direction. Again, it's only the baseboard that wraps around the corner from the dining room that's giving me trouble. The baseboard and trim for the long '70s wall is already cut to length, and now even the "beauty" trim piece for the pantry fits and is installed. To avoid another trip to the garage, I just use my chisel to start the 45° angle I'll need in the corner behind the door.
(Saturday, 9 June 2018)
(Sunday, 10 June 2018)
(Monday, 11 June 2018)
Courtney called last night to tell us the pool pump was spraying water all over. Wonderful. Great. So today I get
to call off work and go look at it. Thankfully Ann is taking the day off to help me too. And I can really use the
help. Lately I've just been tired, with little energy to get anything done. Ann's telling me about this "tape wrap"
stuff that may work to make a temporary fix just until I can get all the pieces parts I'll need to fix it properly.
I'm not looking forward to this at all...
We try out the tape stuff and it seems like a simple fix, if it works. Dip it in water for 5 seconds, wrap it around the area to be repaired, then wrap that with the vinyl outer wrap and let it set up for 15 minutes. Done. The fifteen minutes is up, and it's time to go check out the repair and see if it works. And it does! That's excellent! We make plans to come back this weekend to effect a more permanent repair. We're home before noon, leaving the rest of the day to get things done around the house.
Ann decides to clean and vacuum while I get the garage a bit more organized and the tools and such off the front porch and closer to being put away. All the boxes of screws and drill bits go out. Some even get put away! I vacuum the floor out there and get the plumbing tool box put away. That will about do it until they come to fix the botched counters this Friday. I did manage to get the new water filter put in sometime before today, but don't remember exactly when that was.
(Friday, 15 June 2018)
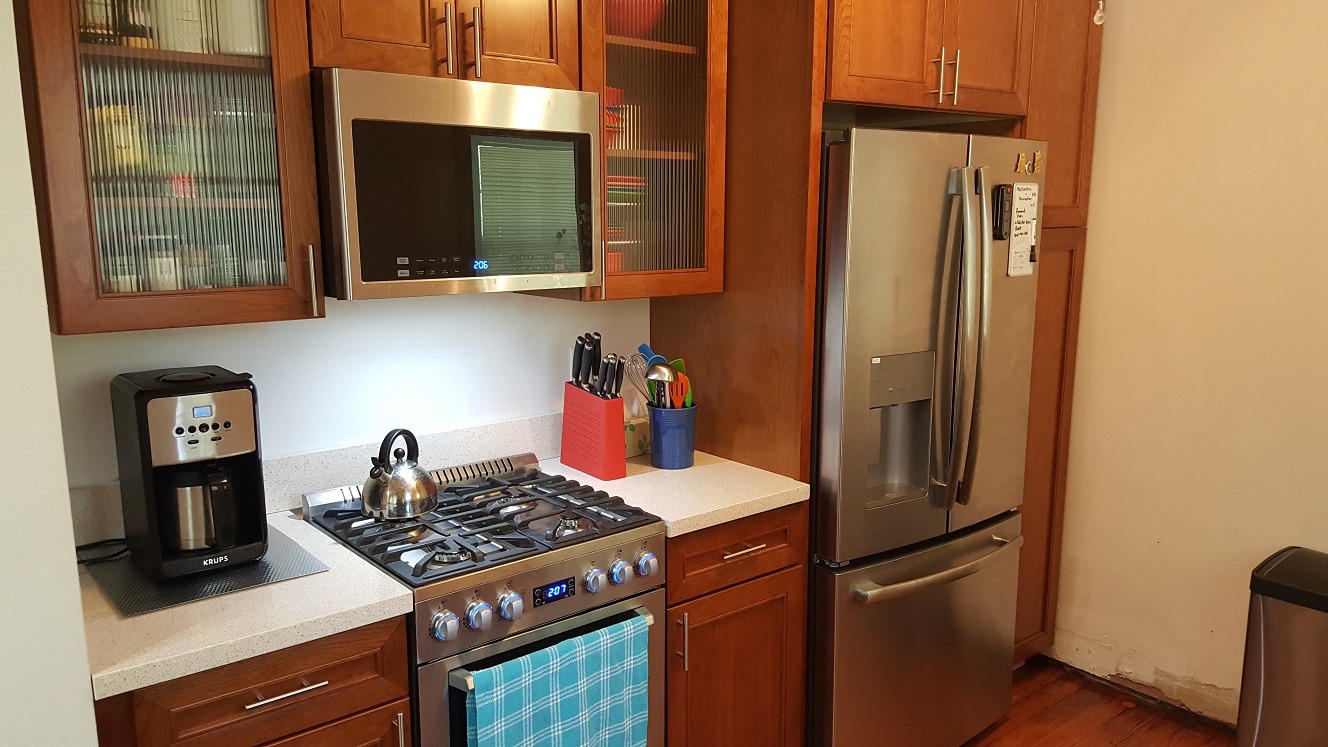
Counters get installed today! Well, the rest of the counters anyway... This time I'm not busy doing any last
minute things, except maybe pulling the coffee pot and knife block and such off the temporary counters they
left us with last time. This time they're here before 10:00, and done before noon, and it looks great! The
fit around the stove is tight and looks like it's supposed to be that way. Whatever they used as the "glue"
for the piece behind the stove is quite strong smelling though. Kind of like model glue (toluene perhaps?)
and I know I'll need to put in the window fan to ventilate it to the outside. It doesn't take long.
The only other thing I may want to do before Ann gets home is paint the patch where the paint peeled off the wall where they temporarily glued the backsplash when they removed it to install the new (corrected) counters. The guy asked if they did that, I'm guessing he meant glued it, and I told him yeah and that's an example of the "sandy" plaster problem I was telling him about last time. He said I could just use some patch on it and I told him I have some "hot mix" if I really need patch it, but would probably just paint it. Told him not sure why that paint likes to peel the way it does either. Never seen paint peel off so easily before, and that's even with a primer coat to seal the plaster first...
Last night as I was loading the dishwasher, I heard something metallic fall onto the inside of the door and bounce, like a small bb. Turns out it's a ball bearing from one of the rollers for the top rack! As I get up off the floor from retrieving it before it gets into the grinder, I manage to kick another one across the floor and under the refrigerator. What the hell is going on? Before I finish loading it, I end up retrieving three more! I mention it to Ann and she says yeah, it's been doing that... Wow. And you didn't think it was important to mention that? I tried to see if I could at least tighten it up with a screwdriver or something. Nope. Looks like Goedecker's strikes again. Now we'll need to submit a warranty claim against the Bosch dishwasher since those rollers are attached with rivets.




(Saturday, 16 June 2018)
Ann ends up going with me to fix the pool plumbing at the other house. We decided to stop at the Apopka
Lowe's for the pieces we'll need on the way there. I found all the 1½" pieces I needed in the garage,
so I'll just need to pick up a couple 2" elbows, couplings, and a chunk of pipe just in case. We get there
and I get right to work, or at least try to... Ann has the bucket with the tools, but she's disappeared with
it. About the time she and Courntey are walking out on the patio looking for me, I'm heading back around the
front of the house looking for them. I walk in the front door, through the living room, and out onto the patio,
meeting them there. Now I can start. But that's
a long story...
(Friday, 22 June 2018)
Ann is helping the kids dig out along the office wall and put in stones to enhance drainage away from
the house.
Ann tells me that they are having a helluva time of it trying to keep up with the lawn with just a push mower. I tell her we need to see about getting them a new lawn tractor then. The look in her eyes is priceless. In a matter of minutes, she's searching online for a new tractor for the kids. Looks like we're buying a new lawn tractor for the kids...
(Saturday, 23 June 2018)
Bought it. Got it. Delivered it. But it's
another long story...
(Sunday, 24 June 2018)
Update this account all day. Or should I say, updated this account that got moved to wekiva maintenance page all day?
What I finally ended up with still wasn't finished, and probably not fit for public forum either.
I've since updated that account to add some more pictures and such. In the mean time, I've kind of lost track of things. My job situation had me concerned. More than I thought I should have to be. The other house is definitely keeping us busy as well. More than we'd like to be.
I found it rather interesting that the old plaster and lathe walls provide better insulation and sound deadening qualities than the modern gypsum board construction. The plaster is impervious to black mold, unlike drywall, whose cardboard backing is food for mold. To be fair, the lathe and studs inside of the bathroom wall that had been in a constant state of "damp" appeared to be growing the black mold. But then again, it had been covered over with drywall, so perhaps it had been feeding it and allowing it to grow where it normally would not have grown.
<< Previous | Kitchen | Demolition | Plaster '70s Wall | Plaster Cabinet Wall | Wall Cabinets | Sink Cabinets | Plumbing | Plaster Sink Wall | Flooring | Cabinets | Countertop and Sink | Finishing Touches | Next >>