Our 2017 Bathroom Surround Tile
<< Previous | Bathroom | Demolition | Reconstruction | BathTub | Flooring | Tile
(June 2017)
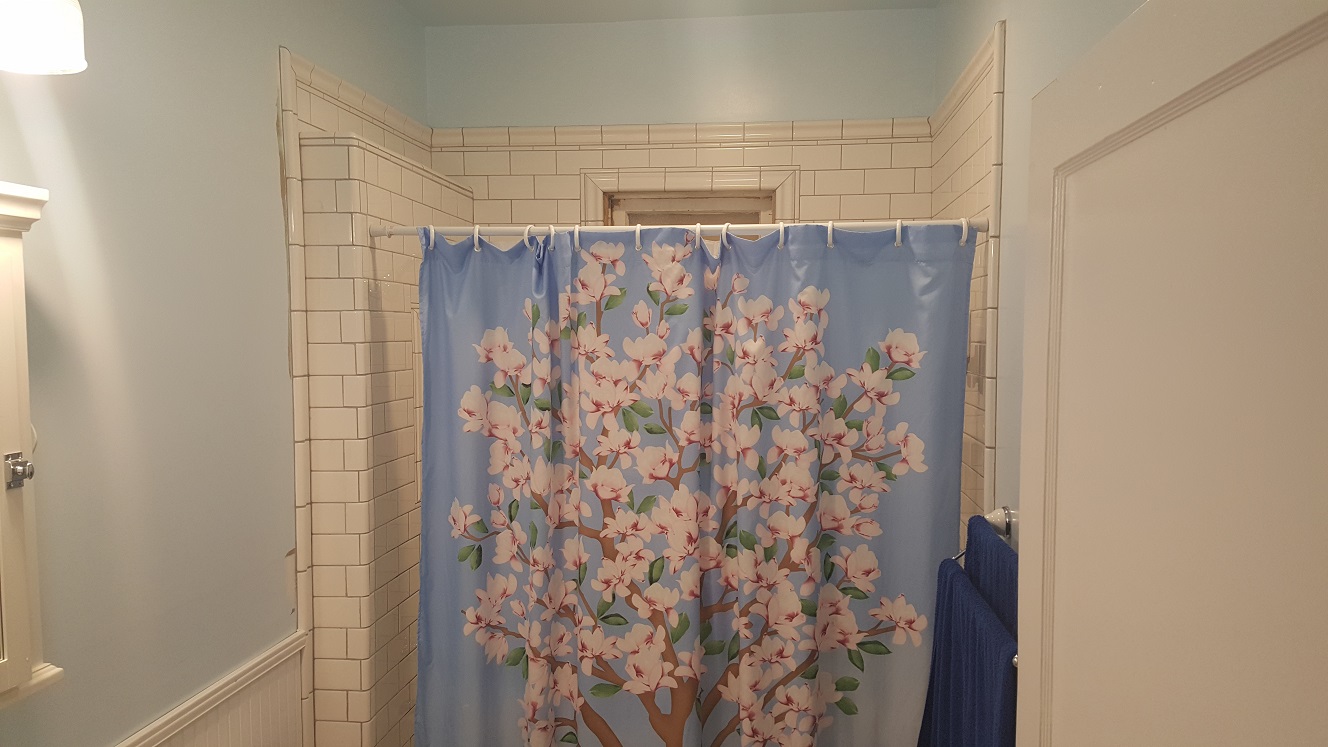
So about that that surround tile... Long story, but I'll try to condense it down. Ann wanted to go with the "subway
tile" for the tub surround to keep with the character of what the original bathroom may have looked like. In our web
searches we found a company that still makes the original subway tiles, used by many big name corporations in their
true to era restorations. I had been agonizing over planning out the surround design, down to the last speciality
tile. The dimensions in their online catalog of the various pieces are not quite clear, and even as I tried to create
models of them in the drafting program I was using to plan it all out, I had to guesstimate lengths, thicknesses,
radii, etc. - the only thing for sure was the field tile was 3" x 6".
The other thing that isn't quite clear on their site is how thick it is or how much this tile costs, with only a request for quote link. And it's per tile, not per job, so we're just as confused as ever. When I think I finally have a good count of all the different pieces we'll need, I submit a request for quote. Well, the reason why so many big corporations used them was because they are probably the only ones that can afford to... For less than 70 square feet of tile it would have been nearly $7000!!! Holy shee-aat! That's $100 per square foot!
We order a sample tile just to be sure that this is what we really want before moving forward, and boy are we glad we did! I had drawn everything as if it were the standard ¼" thick tile... Wrong again! These tiles are solid 3⁄8" thick! Literally meant for the heavy wear and tear of a subway, and while it wasn't much trouble to revise the design, the result did not make a difference. We know now we should have done this earlier in the planning stages. And now we're struggling with how to make this happen and not spend more on tile than the entire rest of the project combined.
We have found other manufacturers that make some of the speciality tiles we need, but not all of them, and not all in the same color for sure. The issue I'm trying to resolve is the lack of any inside corners by any manufacturer, with the exception of outdoor clay tiles. I can make the standard rounded bullnose tile work for an outside corner, the kind meant for overlaying a first course of old tile with a new course, but without an inside corner tile we end up with a straight grout line, top to bottom, in every corner. After a number of trips to a number of different tile stores, hoping for that jackpot find, we realize we are stuck with what is available on the market.
Again, not the end of the world, but certainly disappointing to say the least. I revise my plans yet again, having to redo some of the models, and totally throw away the designs I had based on the true subway tiles. Thankfully the American Olean line of "subway style tile" includes a fancy chair rail piece that I'm able to fit into the design to add some visual interest. We bought some sample pieces to bring home and try some test fitting and to see how it looks. With the exception of those straight inside corners... It looks like we have a plan. Or at least, I'm working on (yet another) one.
I've been after this for months now, and it all comes down to this, make due with what's available from the big box stores... Which ain't much. To me, it's just sad, seeing more of fine craftsmanship lost to lowest price pressure. It's all I can do to get my plans finished, pretty much starting from scratch, using only the rough wall outline over again. Ann is really getting impatient and I'm forced to start installing tiles before I have the entire plan complete. Here's hoping it all works out and I didn't miss anything...
With the original subway tile plan, there were a number of different "corners" available for the trim pieces, depending on the application. Frame corners, like for making a picture frame. Inside and outside corners, like when going from one wall to another. I start by trying the 45° cuts on the chair molds to see how good it does or doesn't look and how well they fit together. The intent is to test the cutting ability of the 4" blade I made work for the floor tile, and the fit and finish it leaves on these fancy, decorative peices. If I try reall hard, and concentrate on what I'm doing, I can use a two pass approach.
That is, I can cut most of the way through, then carefully flip the piece around and finish the cut. But it takes attention to detail, and leaves a noticeable "disjoint", unless it's ground away to match the first cut. I decide to use the 4½" blade, which I don't have, until Nick and Ann bring me a new one from Horrible Freight. This time it cuts nearly completely through it, and the tile "snaps" cleanly along the stress line it creates beneath the surface glaze. If there is any "leftover", it cleans up quickly and easily, and is it not as noticeable.
(10 June 2017)
Happy enough with the results, I proceed to apply the first course of tile over the tub, using thin "spacer" boards
to keep the tile from resting directly on the sides of the tub. I continue to add course after course, until I've
exhausted the first box of tile or the amount of thinset I've mixed. Opening a new box of tile is easier than cleaning
up the previous mix and making a new one, but I keep going until I need to cut out the tiles for the supplies. All in
a day's work, an appropriate way to put it. That's all I can do today anyway, at least until I get more thinset that
is.
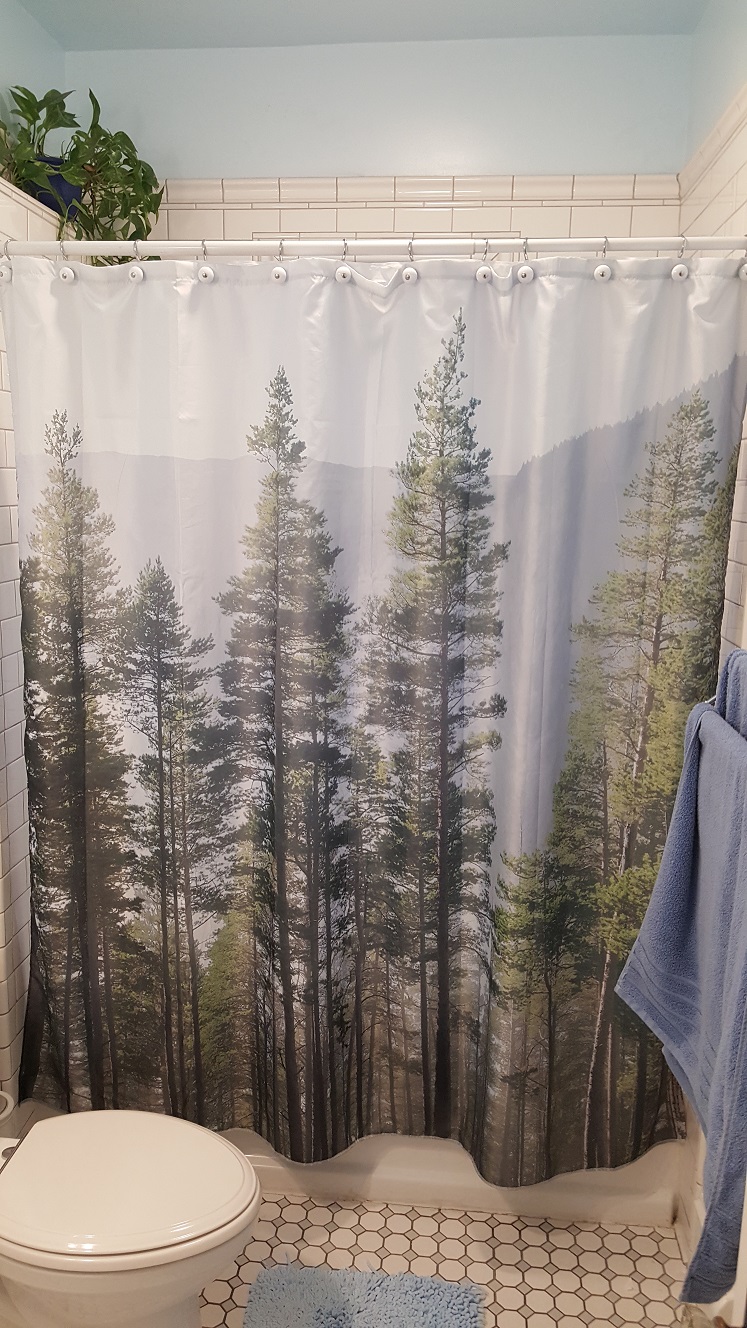
I did want to get both the tile "shelves" in place so that they had enough time to setup, but ended up breaking one of them, as well as the towel bar end I dropped on it trying to test fit that... Oh well, add those to the list. Fortunately, I didn't need the towel bar piece right away, since Ann had picked it up at the Home Depot, and there isn't one nearby us. The white of the towel bar is just enough different that you can tell it isn't the same tile as all the rest. But it's the only one that is made in the style Ann wants. I suggest we should make it a complementary or accent color, but she doesn't want to use gray or black, and any other color would force a match in other accents, like towels, curtains, etc.
<< Previous | Bathroom | Demolition | Reconstruction | BathTub | Flooring | Tile
(11 June 2017)
In hindsight, stopping the first course of tile at the height of the first shelf was for the best. It allowed me to cut
the tiles to fit around it and the tiles beneath to have time to set and be able to support the shelf's weight. The second
course goes on, and on, and on... It takes me all day to get done and I still have another course to go before I
can put in that trim tile so I can final cut the wainscoting to size. I strategically stop at the height of the second
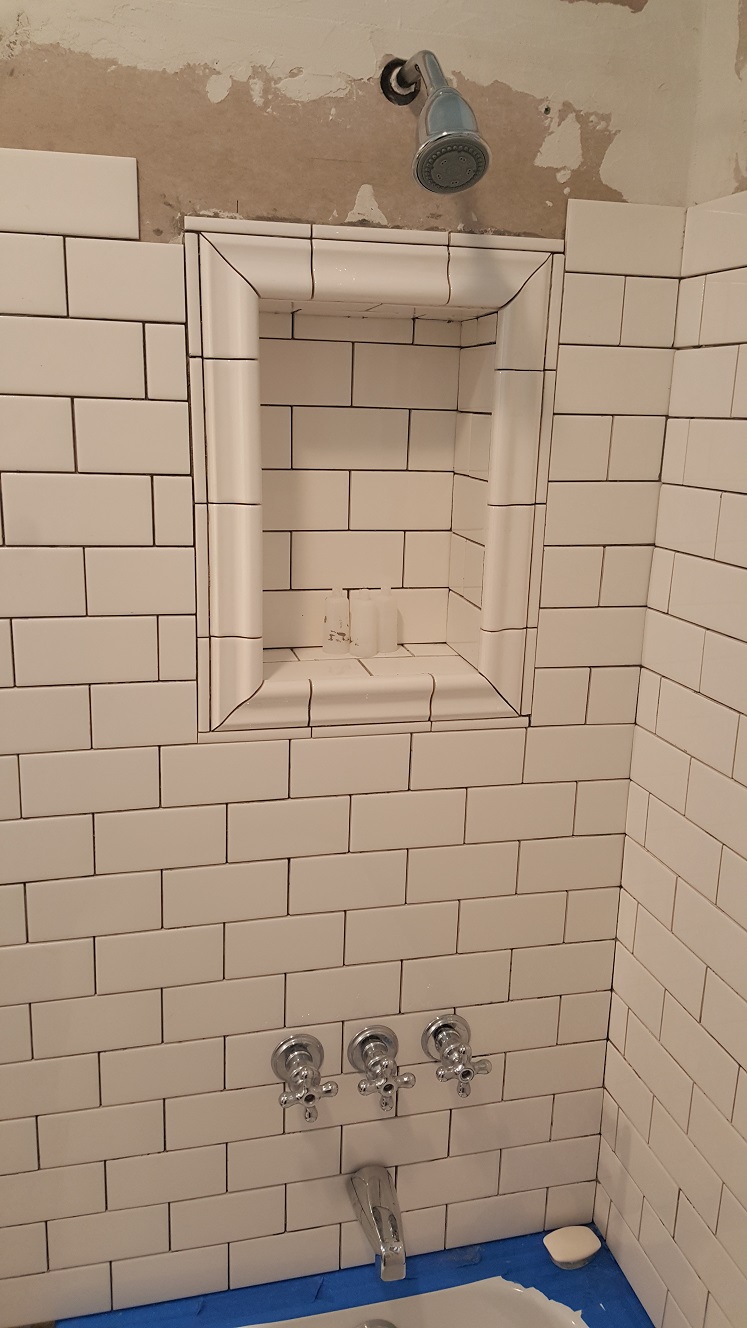
shelf, learning from the first one. I also concentrated on getting the front wall tiled around the inset, and that's what
took a lot of the time, having to cut so many tiles to fit and perfect the chair rail and liner tiles to frame it with.
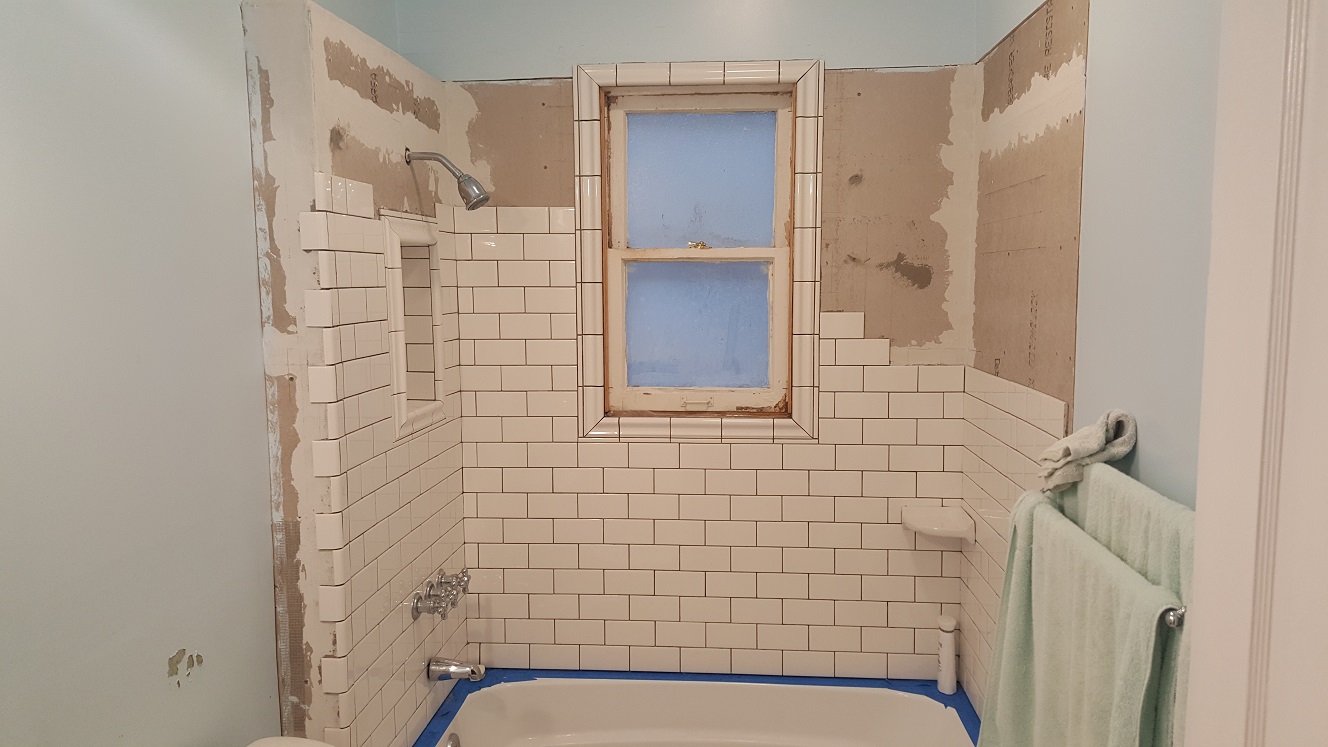
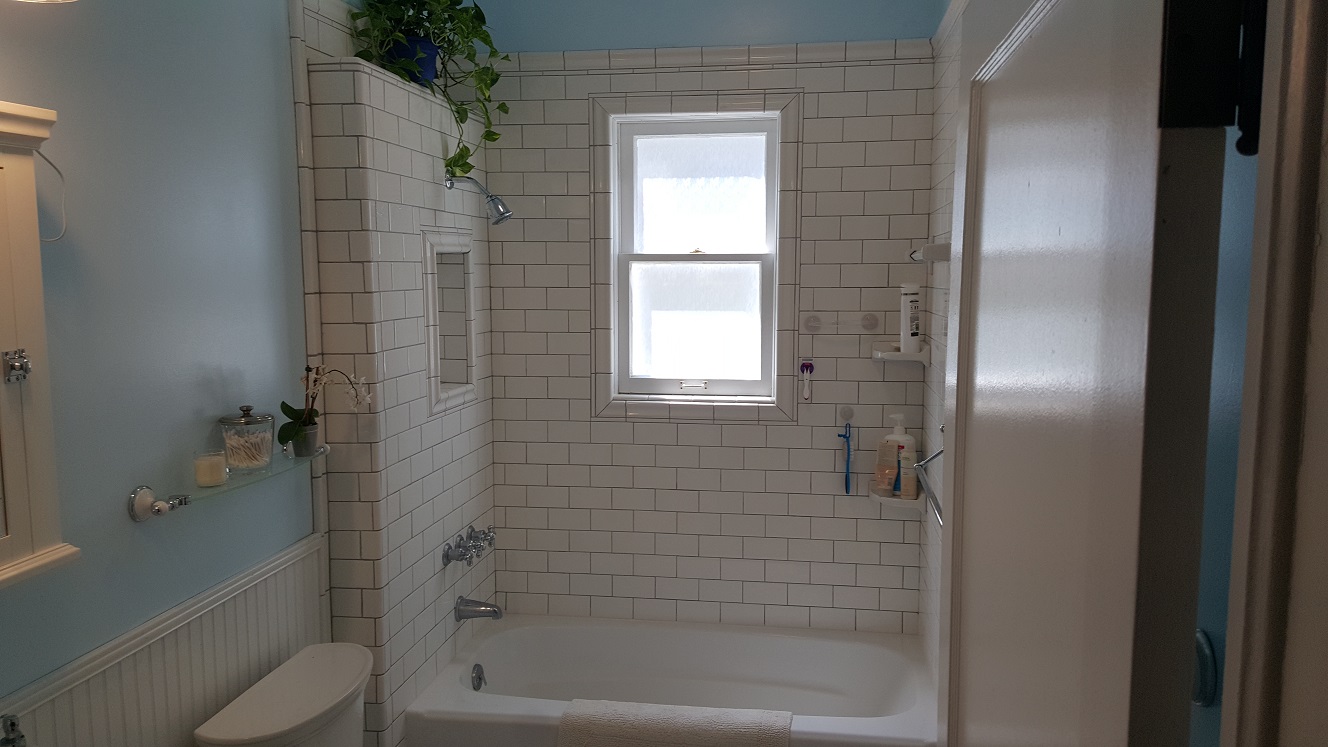
With the front wall tiled around the controls and nearly as tall as the shower head, much less of the backer board is exposed to the splash of showering, at least for the next week or two. The grout lines are still open since the grout must wait for the tile to be finished first. A lot of what's left is the field tile, but it needs to be cut to fit, along with the pieces that wrap around the corner of the bulkhead. For that I'm using the "mudcap" tile, but it's 6" tall and the field tiles are only 3" tall, so they need cut in half. Along the top of the bulkhead they can be used as is, along with a corner mudcap. A pair of those costs almost as much as a box of the mudcaps though. Guess they know they got you there.
(23 June 2017)
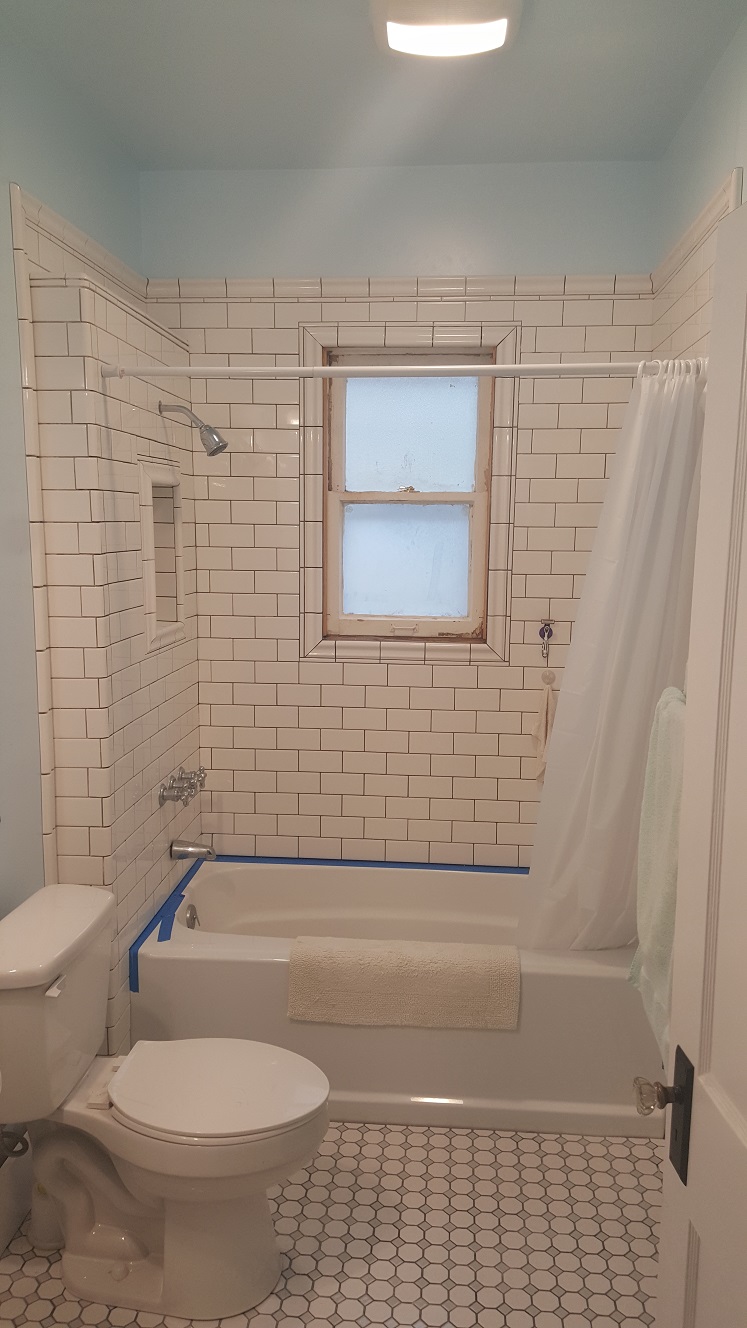
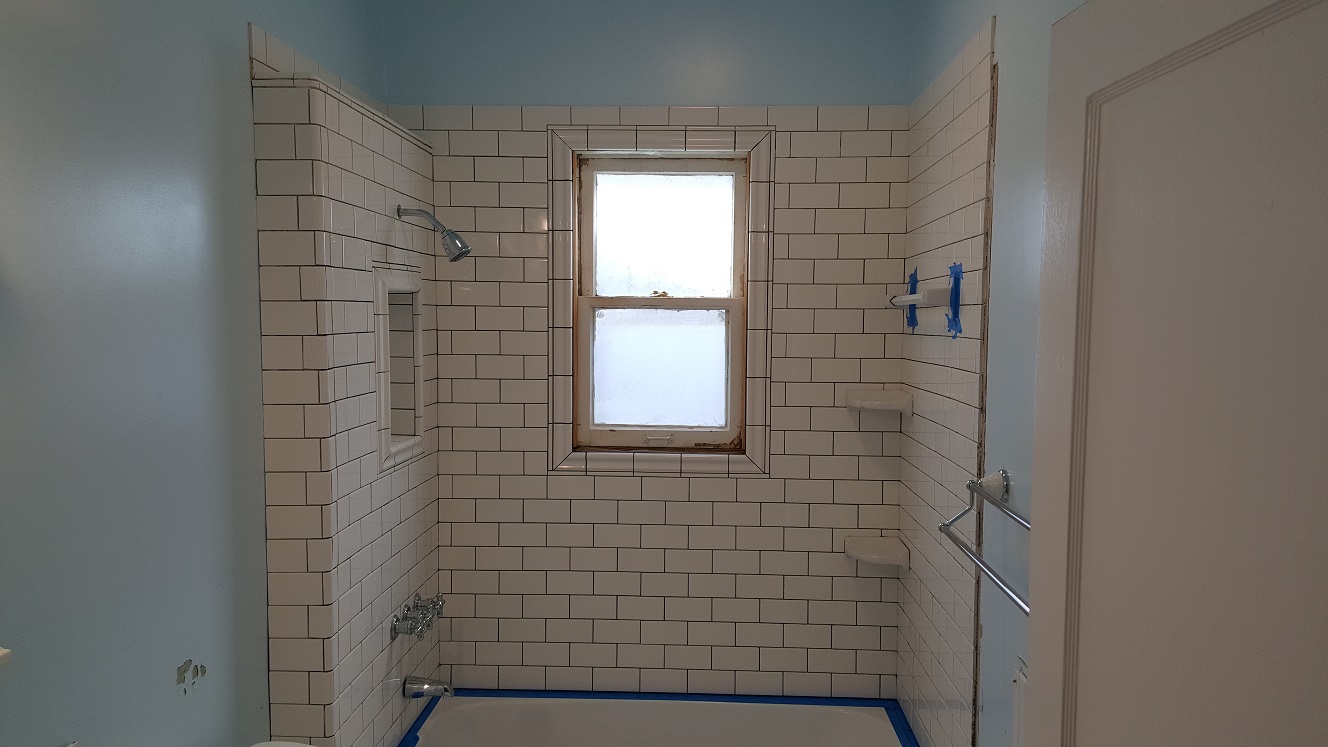
Having finally figured out how to finish off to the top of the bulkhead using even more liners, I proceed to get the final
course of tile in place. Well, if you don't count the chair rail trim around the outside, it's the final course of
tile... I get the front wall and around the top of the bulkhead fitted and installed. I leave the fitting of the tile
at the side of the bulkhead along the window wall, along with the rest of the tiles that need cut to fit over and around the
window for tomorrow, concentrating on getting the area around the towel bar installed last. For the same reason it was good
to stop the first course at the height of the shelf, I want to make sure that the tiles around the towel bar ends have had
time to set before having to support them.
(24 June 2017)
Today I finish what's left of the final course of tile. It takes some time to get the tiles cut and trimmed to fit around
everything, and some of them I need to recut, but eventually it's all good. The only issue I'm having is where the tile
spans the transition from the back board to the drywall, mainly because the drywall is slightly thicker. I thought it would
be easy enough to just add a little extra mortar to "build out" the low spots on the backerboard, but that proves to be more
difficult than it sounds. In the end, the tiles end up canted slightly, but it isn't really noticeable unless you're looking
for it.
The one last thing for today is the towel bar. I mortar the ends in place, remembering to put the bar between the ends, then clean all the excess mortar from around the joints. Then I tape the ends to the surrounding tile to hold them in place while the mortar sets. Finally! All of the tile is set in place. It's really starting to come together now. All that remains is the chair rail trim, but that will have to wait until next weekend since I'll have to remove the beadboard to have room to install it. That will work out nicely since the 4th of July is on a Tuesday. I'll take that Monday off too and have a "four day" weekend to finish that and the grout.
(1 July 2017)
I started the chair rail trim at the top corners and worked my way around the top of the tile, then worked my way down toward
the floor. In added a set of liners along the top to dress up the line between the tile and the trim. Coming down the sides,
I lined the trim pieces up with the grout lines between the tile courses. This left a bit of a larger gap since the length
wasn't quite long enough to make up for the extra grout line, but I'd rather see them line up than stagger away from the tile
courses. To me, it just looks wrong when they stagger and take on their own pattern like that. While it may be the way you're
supposed to do it, I don't. It takes a little extra care, but in the end, I like it better that way.
The most trouble is having to cut all those pieces at the bottom and the floor tile to fit and set it all in place. I left a small area of floor tile loose at the bottom of where the chair rail would meet the floor on both ends of the tub. I had to do some custom cutting and fitting to get it to all come together and look like it was supposed to be that way. But it took almost as long to do that part as it did to get most of the rest of the trim done. Then I almost forgot I wanted to set a bunch of field tiles on a scrap piece of backer board as a test bed for the two different shades of grout I had found to match Ann's specification of "light gray".
After hearing about how the floor grout was too dark and wasn't even the same shade across the entire floor, and hearing about it more often than not, I knew we had to get this one right. I bought the two lightest shades of gray grout I could find, but knew that anything other than white would look much darker against the white tile. Once those tiles were set, I mixed up a batch of both shades, applying each to half of the tiles for a side by side comparison. I'm glad I did because even though both were a very light shade, as I suspected, they both looked much darker against the white tile. Even the very lightest one still looked gray, but just enough to distinguish the grout lines from the white tile, accentuating the pattern.
(2 July 2017)
So now that we have our grout chosen, I need to tape along the edge of the trim tiles, mainly to keep from leaving a messy
line along the drywall. Turns out that was a big mistake, but I'm getting ahead of myself. I guess I underestimated just how
much grout I'd be doing. I end up going through an entire bag, a big 20# bag of grout, and still need more! So now my concern
is color matching... Hopefully the two batches are close enough to the same shade. Turns out they're both from the same batch
so should match perfectly. It takes two days to get it all done?
But now that it's all done and we're ready to remove the tape, it doesn't want to come off, at least not without tearing the paint and drywall paper away with it! What the hell? Isn't that why they make painter's tape, so it doesn't stick to the paint when you peel it off? Maybe because it got damp beneath the tape when I was grouting? Dunno, but now I have some big, awful, ugly spots in the wall - right down to the cardboard of the drywall! It's very upsetting to me at the time... Knowing I would have been better of to not mask it at all! Now I'll get to try to paint a straight line along the grout, a line I know won't be straight no matter how hard I try to make it that way!
(9 July 2017)
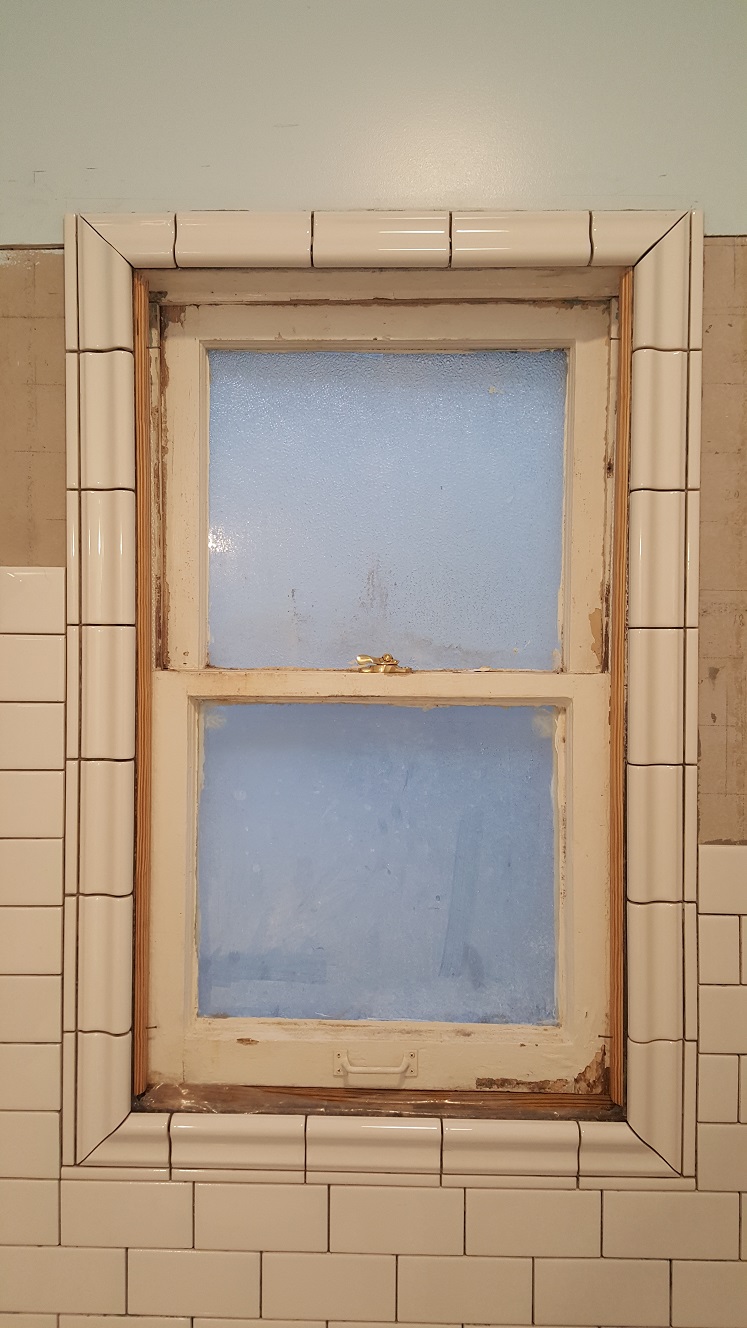
Time to take a break from it and enjoy our 4th and not worry about it. Easier said than done. I make a new
"storm" window frame using a piece of plexiglass to take the place of the window sashes while they're out to be repaired
and refreshed. The lower sash joinery has come loose on one corner and will need glued back together. Both need the old
dried and cracked glazing putty removed and replaced. I manage to get all the old putty out of the lower sash and all of
the old paint stripped off, but just as I'm finished and about to set it on the floor, the glass falls out! It bounces
not once, not twice, but three times. Then it slowly falls over, against the one thing that will break it, before
I can catch it... And it shatters. Looks we're going to need a new one of those.
At the time I'm thinking great, now I need to find a glass shop somewhere here in town and go get a piece cut. Turns out Lowe's has glass and will cut it to size for free. So Ann and Nick are heading to Lowe's to pick up a piece of glass for me and hand me a brown paper wrapped piece of glass when they get back. They also picked up some privacy film for the window and some other things for the bathroom. Now all I need to do is put in the new glazing points and try out the new caulking style "putty". Well, first I want to get the now bare wood sash frames coated with some linseed oil, hopefully enough protection from the constant dampness of the shower once painted and installed.
That takes some doing though. While the lower sash is ready to paint, I have yet to get the paint removed from the upper sash. Every time I'm out to the garage, I scrape a little more paint off of it. Eventually I get to where I can linseed oil it too. Once that's had adequate time to set, I paint both. Once that's had enough time to dry, I apply the new glazing compound. Once that's had adequate time to cure, it's time to install them... Not quite. In looking at them closely, I realize I need to trim the excess. It's easy enough to cut and remove with a razor scraper, but it's a time consuming job. Eventually I'm happy with them and they're ready for the privacy film.
I read the instructions and prepare everything as directed, but the privacy film doesn't want to stick around the edges very well. I do my best to get it all trimmed in, working on the kitchen counter, and finally get both as good as they're going to get. I'm still not pleased with the results, but unless you're in the shower and looking right at them, you can't tell. So the sashes are back in. I even remembered to paint the new stops that hold the lower sash in place. They need cut to fit now that I've built up a new sill, using tile and backer board in place of the chunks of pressure treated 1x4. I nail them in place and try to minimize the opening between them and the tile that will need caulked.
(29 July 2017)
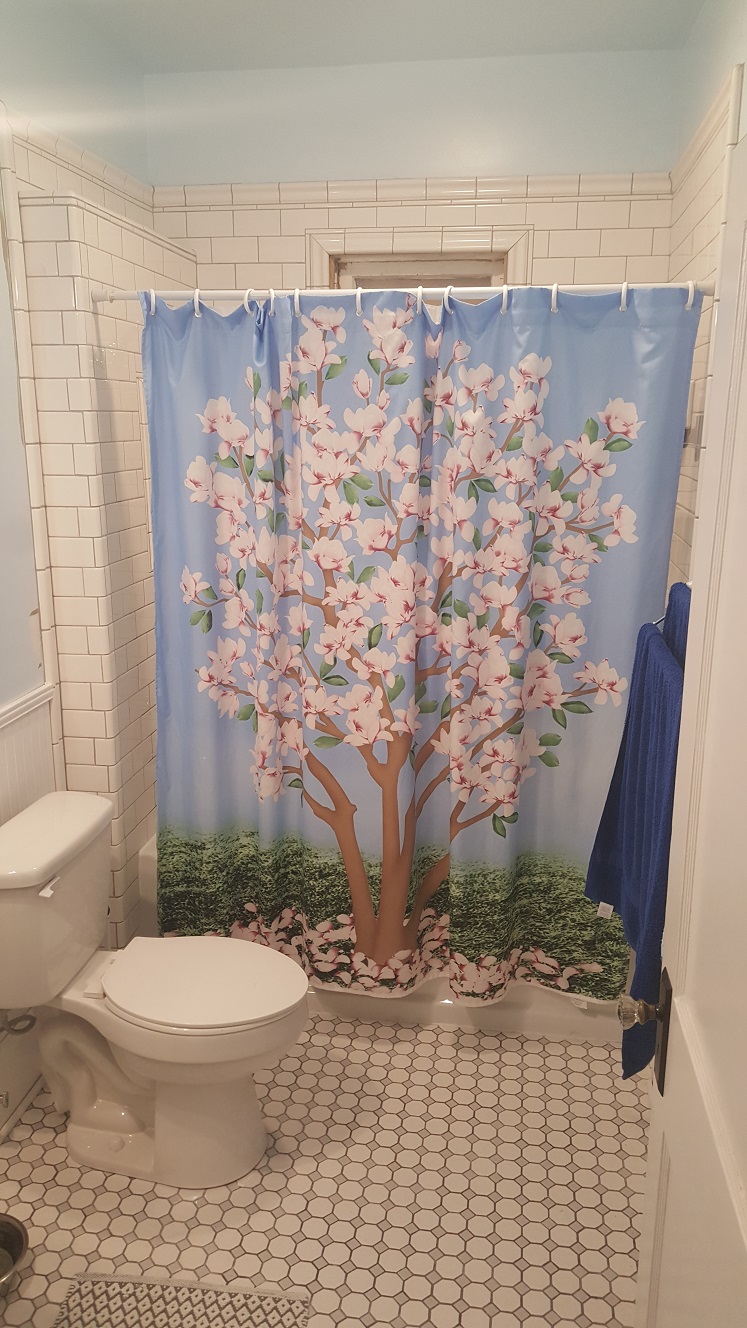
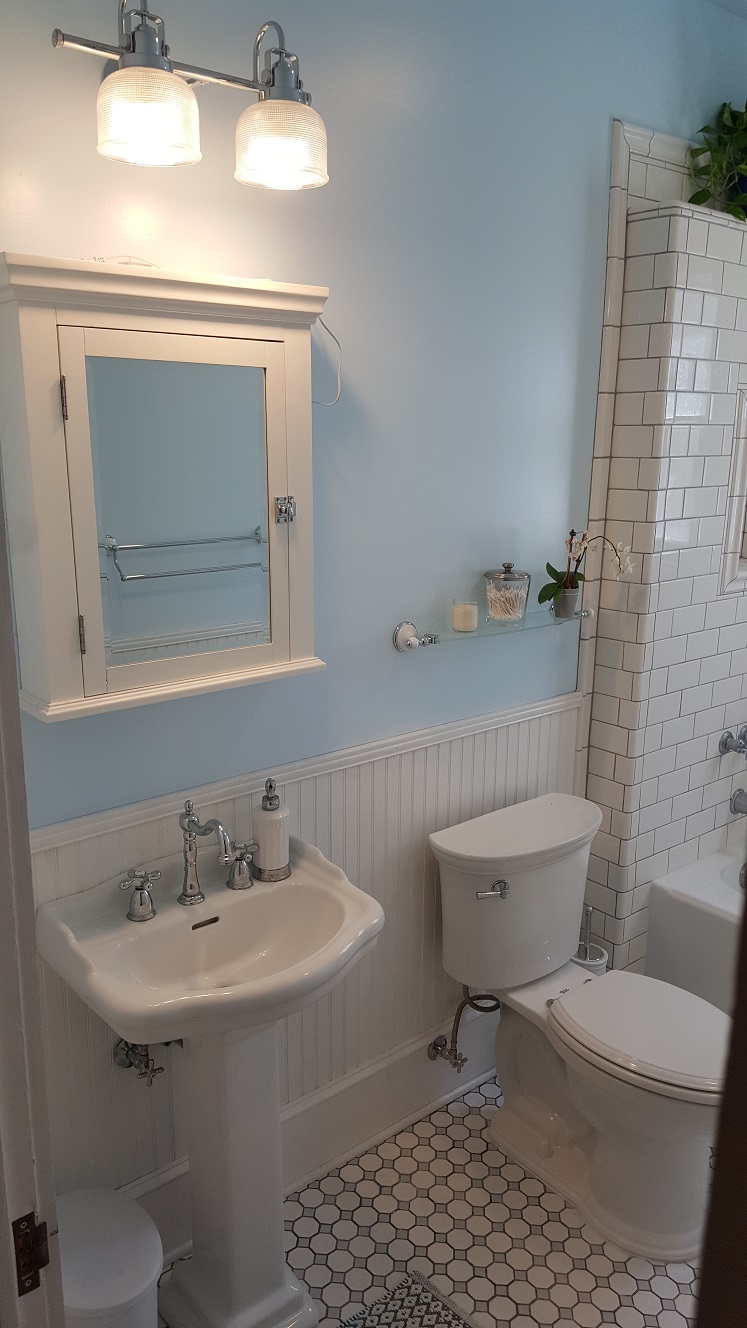
Ann finds a nice little glass shelf on eBay that matches the towel bars to fill in the "empty" wall space over the toilet,
rather than a picture or the like. I install it right after it arrives and it ties everything together nicely.
(August 2017)
The beadboard and baseboards and trim are all cut to size and back in. The ugly parts in the wall that the tape pulled
off are once again painted and pretty. With everything in place, it's time for caulk. I use the ALEX, which I'm guessing
is short for Acrylic LatEX? After seeing how terrible of a job it does, I think it stands for cheapest bullshit on the market,
and don't waste your money. Within days, it's starts pulling away from the edges of the tub and the tile. So glad I wasted
my time applying it. I dig out the installation instructions for the tub, remembering they recommended a number of different
caulks that are compatible with the plastic tub. We order a couple of tubes from Amazon.
So not only did I waste my time applying it the first time, now I get to waste my time removing all of it so I can apply the new stuff. I have to be really careful and take my time removing it from the plastic tub because one false move will scratch the finish. It takes me all day but eventually I get the new ECO-BOND installed, and no, ECO is not short for ECOnomical... But at least it does work and is flexible enough to move with the tub. About the only place I'm not able to get to is the base of the tub at the floor tile. While we're happy with these results, we continue to have issues with the privacy film over the next few months... Nick eventually figures out the privacy film has a peel off backing that the directions say nothing about? WTF?
(14 August 2017)
Went to KSC for Nick's birthday!
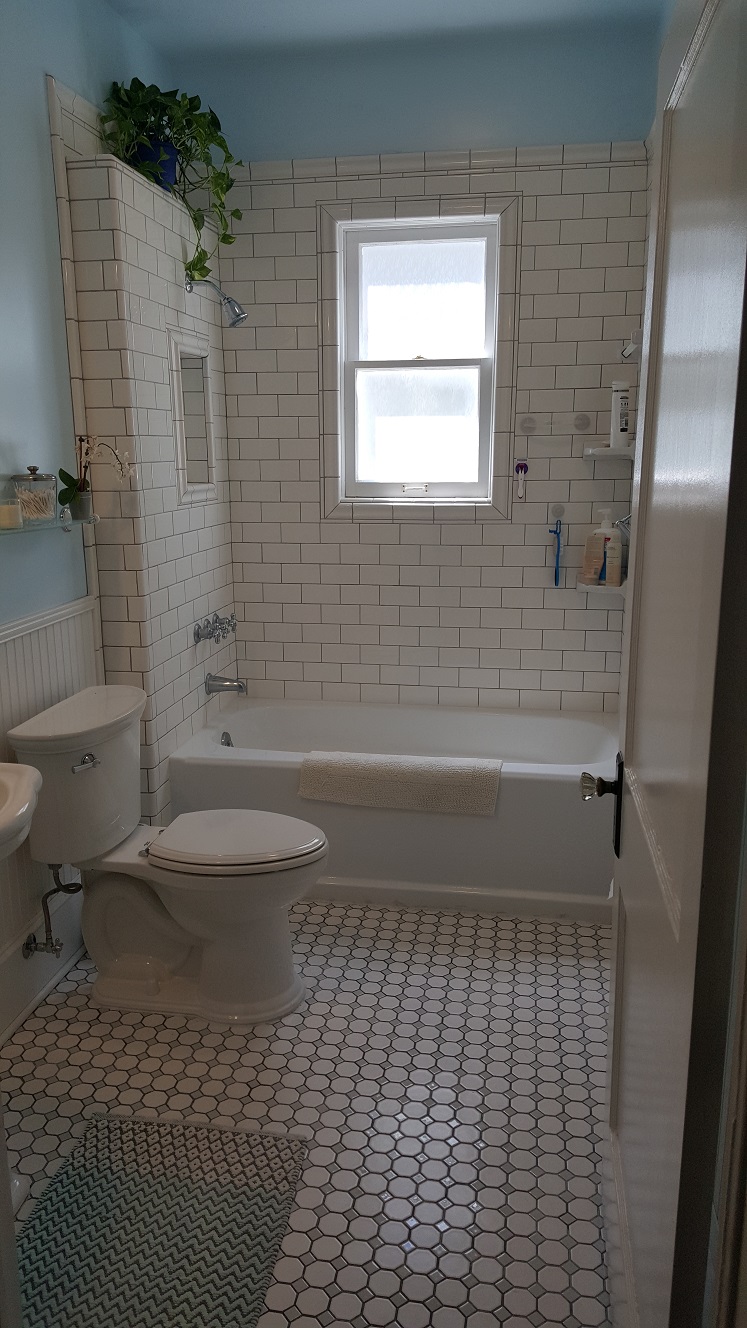
Looking back, when I see things I could have done differently, I wish I would have taken the time to finish the plans before I started tiling. In other cases, even though I had a plan, and precut tiles to fit, I somehow managed to mix them up and use the wrong ones in places. Good luck trying to find those few places... I won't tell. Anyway, come the end of August, it's all done and looking absolutely beautiful... Definitely well worth all of the effort that went into it!
It's Down To The Last Details...


<< Previous | Bathroom | Demolition | Reconstruction | BathTub | Flooring | Tile