Our 2016 Bathroom Demolition
<< Previous | Bathroom | Demolition | Reconstruction | BathTub | Flooring | Tile | Next >>
(25 November 2016)
Our revised plan was to open up that hatch in the hallway floor to get an idea of how much demolition it's going to take
over Thanksgiving so that we're ready to start rennovation by Christmas. Our hope was to gain access to the problem areas
without having to totally tear up the floor all at once. No such luck... Our demolition has to be put on hold until the
Christmas break because we need a functional bathroom if we're to live here. The many pictures we took showed the extent
of the damage.
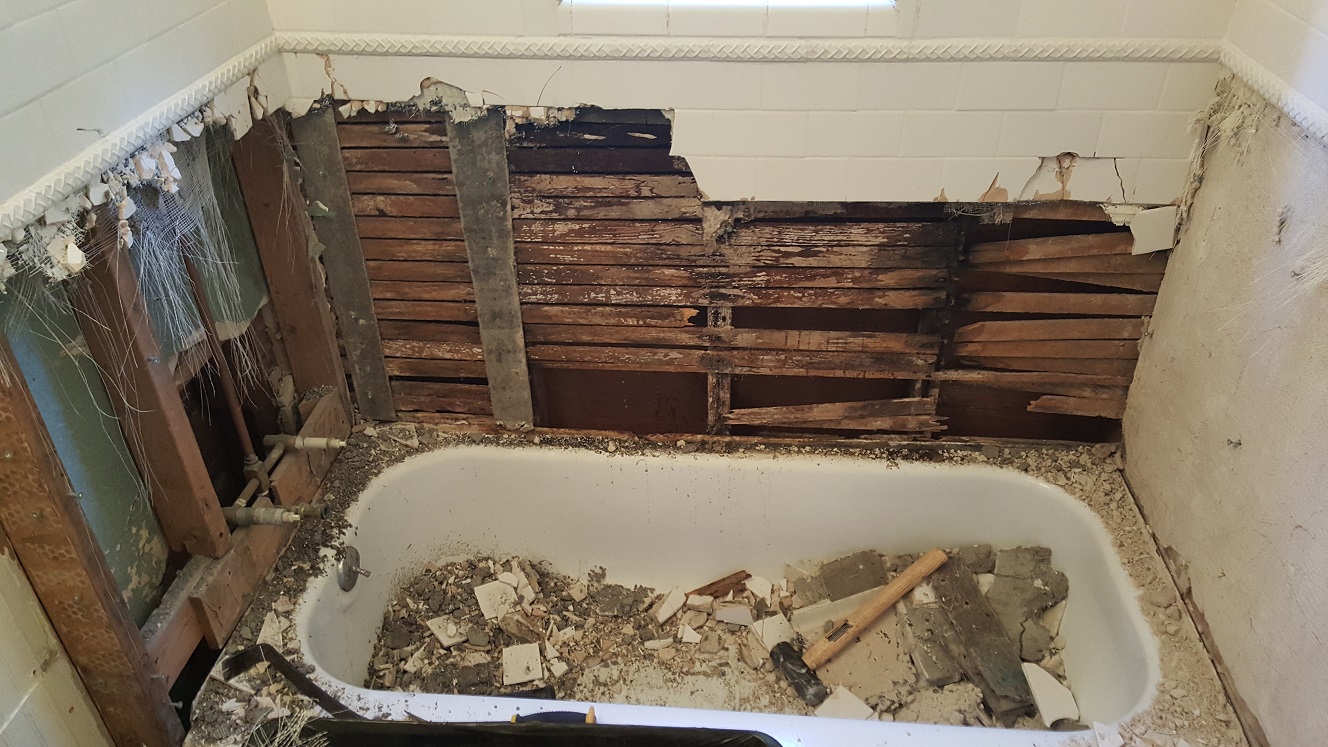
What we found was pretty much what I suspected, although to a much larger degree. Not only was the floor beneath the bathtub pretty much rotted from constant damp, but large parts of the floor and subfloor were already missing. The floor under the sink was totally missing! No wonder it felt like you were falling downhill when you were standing in front of it! The time has come to do something about it, but I worried we're not going to be done by the end of the Christmas break. By done, I mean having at least a new subfloor and a functional toilet in place. There's no way this will be totally done by the end of Christmas break.
(24 December 2016)
In any case, the demolition of the entire bathroom pretty much started on Saturday, Christmas Eve. I mean down to
the studs and see the dirt on the ground beneath where the floor used to be demolition! It's in that bad of shape. But I'm
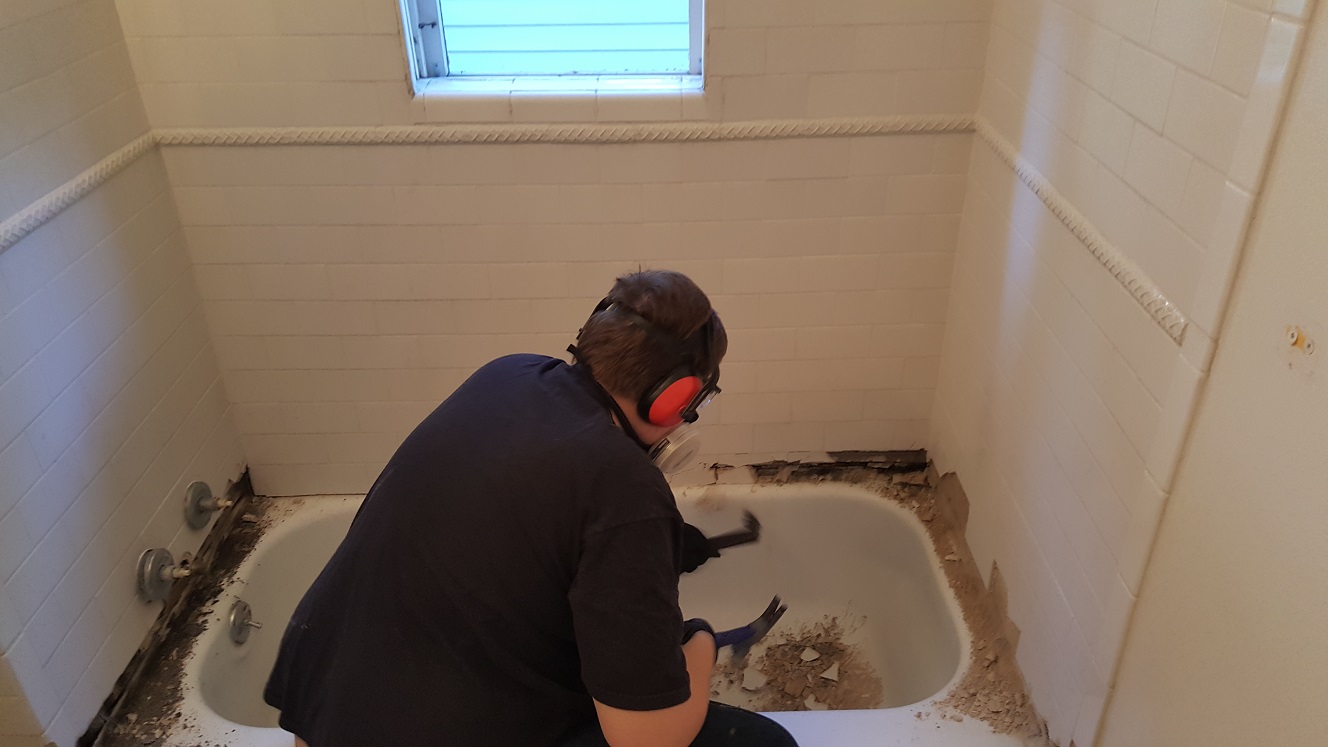
getting ahead of myself. Nick starts by
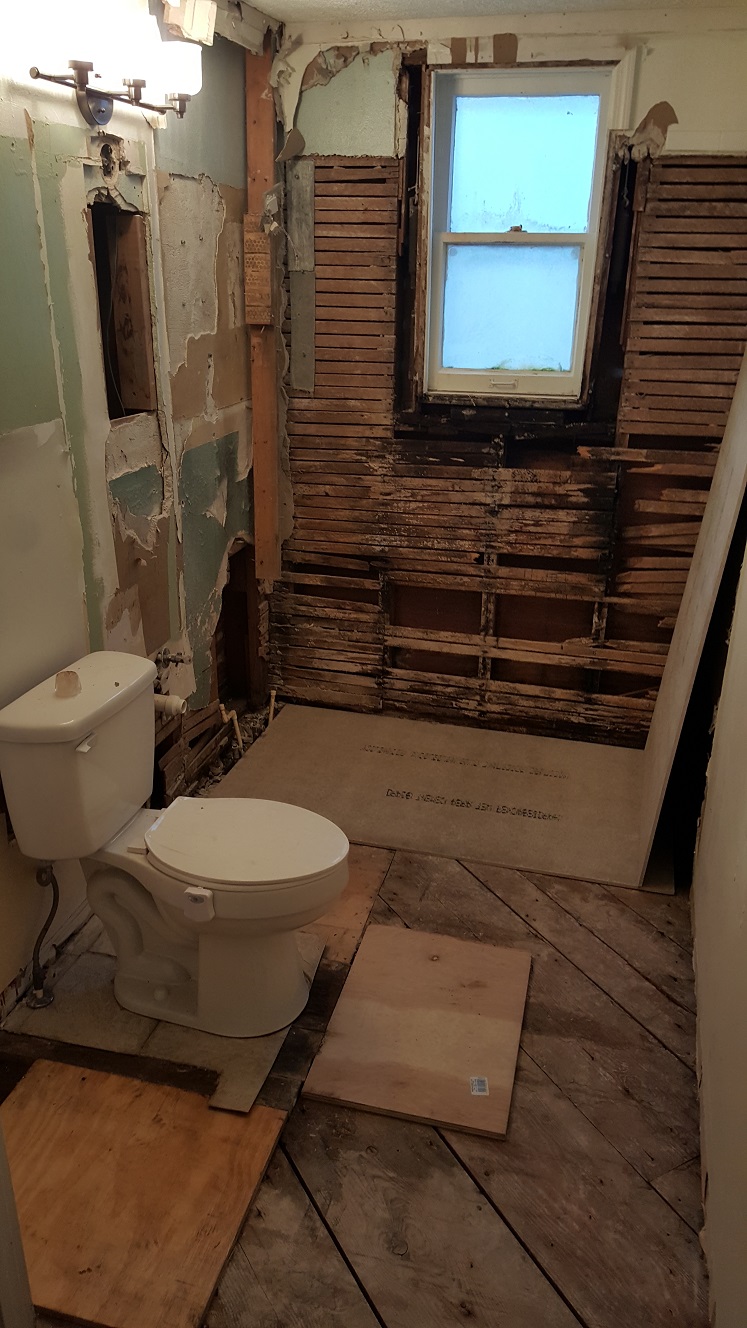
removing the course of tile around the tub. The more Nick removes, the more is revealed.
The tile's set on drywall overlayed on top of whatever was left of the wall beneath. The back wall of the tub surround is just drywall nailed over the old plaster, cracking it and pretty much destroying it and any chance we have to save it. The front wall has the bulkhead built out from the original plaster "wet" wall, and what's left of it is in pretty poor condition. On the window wall, the old plaster is already gone and nailers have been added on top of the old lathe for the drywall, probably to hold it away from all the damp rot they neglected to address when they had the wall open.
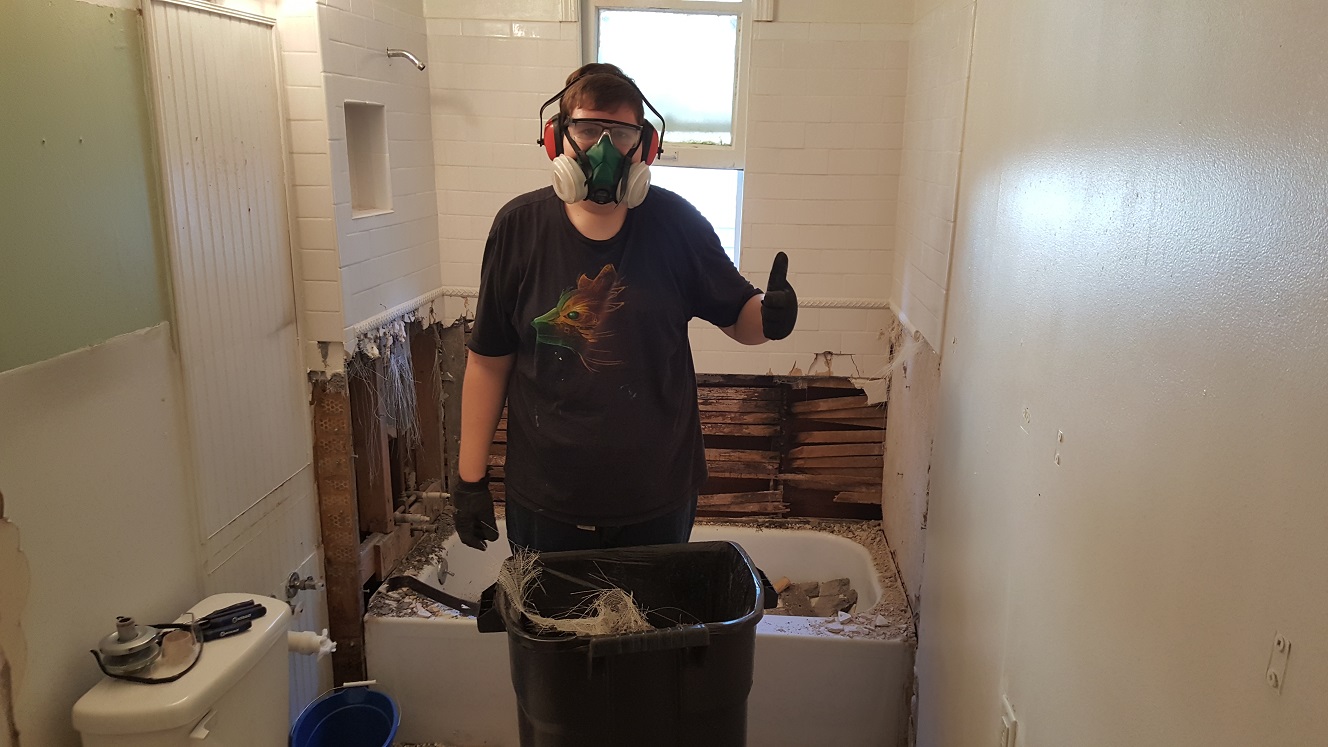
We remove the rubble from the reveal and decide what to remove next. The tub has to go to get access to the floor and see how bad it really is. Besides, the rubble is piling up, and I don't want a bunch of garbage bags full of heavy as shit plaster sitting around for the neighbors' cats to piss on. And the lathe boards, full of rusty nails, will need a home. So why not just use the old bathtub as the dumpsite for now? Not in the house, outside, at the back of the driveway of course!
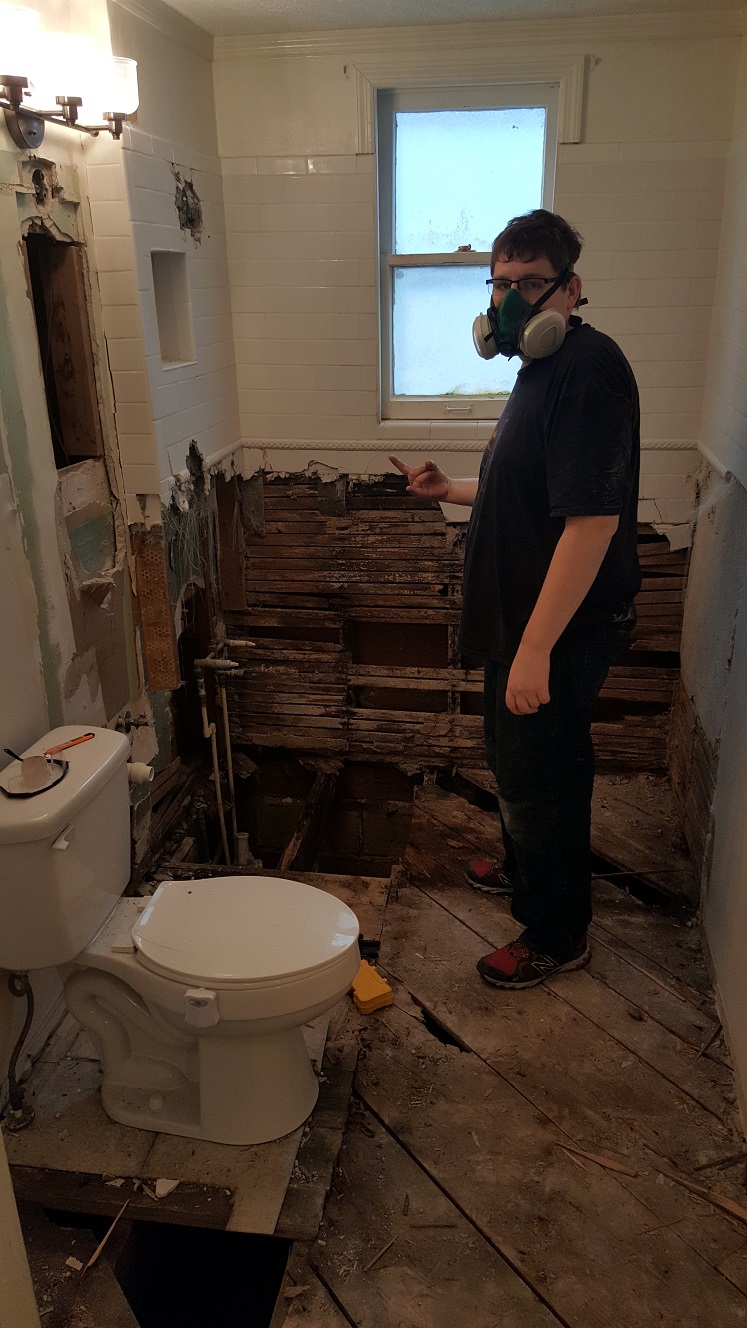
That beadboard next to the bulkhead needs to go next so we can see what to expect from beneath it. It's always looked silly and out of place and we always wondered why it was there and what it was hiding. Now's our chance to find out. Nick's asks, "You want I should get rid of this?" It's covering the opening where an old medicine cabinet used to sit between the studs. If you've seen the photo you'll notice there's not much left of the floor where the tub and sink used to sit, and the throne looks woefully unsupported on just those old floor boards, and nothing else to, hold it up. That's it, just a single course of ¾" floor boards are keeping it from falling through the joists.
We really need to get the rest of that bulkhead out and down to the original plaster wall. Nick goes to town beating on it with the sledge hammer and gets it out pretty much up to the dropped ceiling. There's still more to do in the corner, but it's time to start cleaning up and getting things back together enough to have a working throne room. For now the only sink we'll have is the one in the kitchen and we'll be showering at Nick's place until this rennovation is complete enough to use the new tub and shower. That's going to get old quick, especially with the winter cold outside. Showering is exactly what we're doing next, so over to Nick's, then back to enjoy our usual Christmas Eve snack fest and opening a present (maybe two).
(27 December 2016)
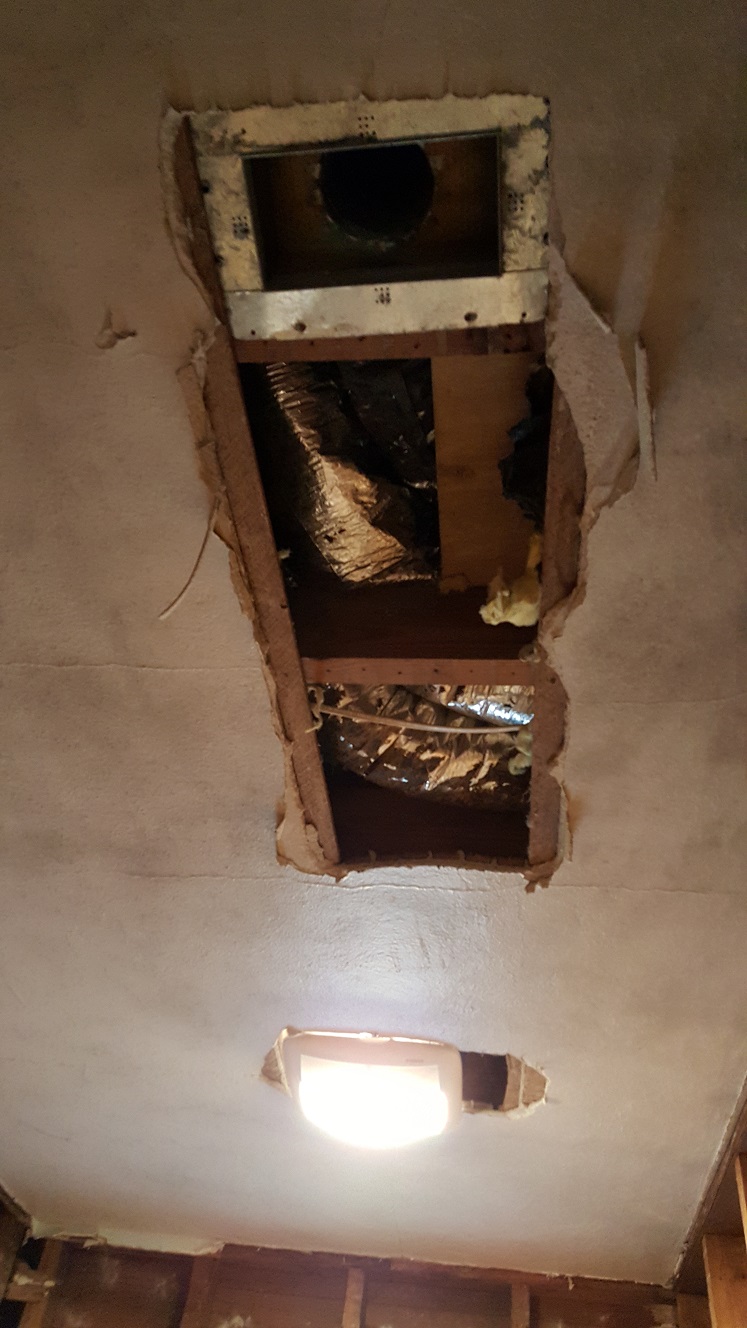
Over the last few days, including Christmas, we've been at this demolition solid. Christmas day saw the dropped ceiling
gone,which meant the old ventilation fan and air conditioning register were gone too. It also meant that all of the old
plaster from the original ceiling that had fallen down onto it had to be removed too. I saved what I could of the 2x4s
that used to frame in that stupid lowered ceiling structure. We had to be careful of where we walked since most of the
floor there was rotted away and missing. Next we took off the rest of the drywall. Slowly. Piece by piece, breaking and
prying it away from the plaster beneath.
The plaster is gone. There was no way to save it. The way the drywall had been put up over the plaster by nailing through it, coupled with the pounding of the sledge and the concentrated force of the prybar just made it impossible to save. The plaster was falling to the floor before the drywall covering it could be removed completely. What was still left hanging by the plaster "keys" through the lathe was not enough to justify repair. While we wanted to save the plaster just for its historical significance, saving the plaster would have saved us time and materials too. Time we just spent taking off all that lathe and taking all the nails out of all that lathe and taking out all the nails we missed, left behind in the studs. Time limited to this holiday break.
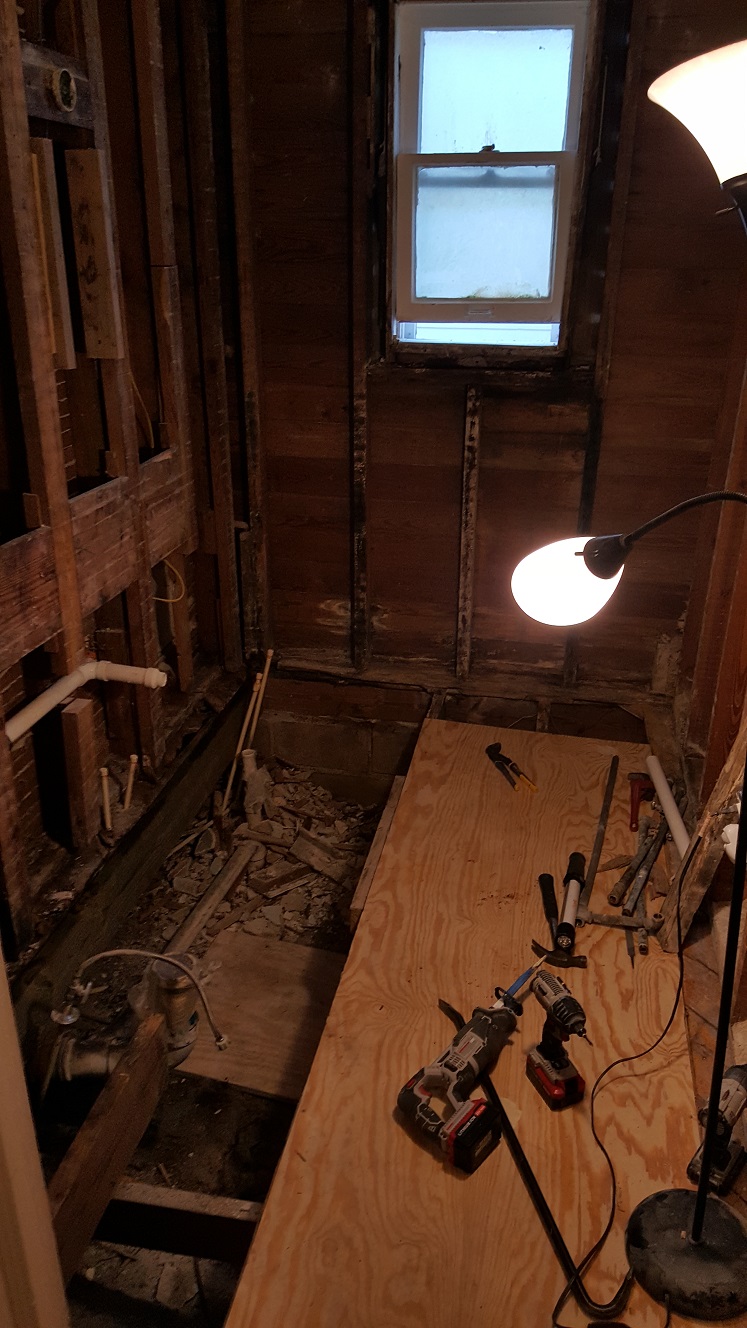
It's already Tuesday and we're just now exposing the floor joists. After realizing not even a quarter of the subfloor was salvagable, we decide to just put in an all new ¾" plywood subfloor. The joists under the tub nearest the drain were damp rotted across the top and would need a daughtered joist or replaced entirely anyway. And this way we could have access to level and reinforce the joists as needed. There is no way we're going to be done by the end of the Christmas break. At this rate, we'll be lucky to have a new subfloor in place by the end of the break. But that doesn't stop us from making progress. We're "down to the studs and see the dirt on the ground beneath where the floor used to be" done with this demolition. Time to start putting things back together!
(1 January 2017)
Over the last few days we've actually been working on reconstructing the floor joists, doubling them with new 2x8s, and
levelling them and the rest of the surrounding joists as best we can. We've come up with a plan for the subfloor plywood
such that more than half of it is down to stay permanently, with temporary attachment only in the areas we need continued
access to, such as the plumbing and waste lines. We do discover the reason for the leaning of the pier. Looks like they
had to cut down a tree when the house was originally built, and what's left is the rotted stump, and the rotted root
that used to support the pier block.
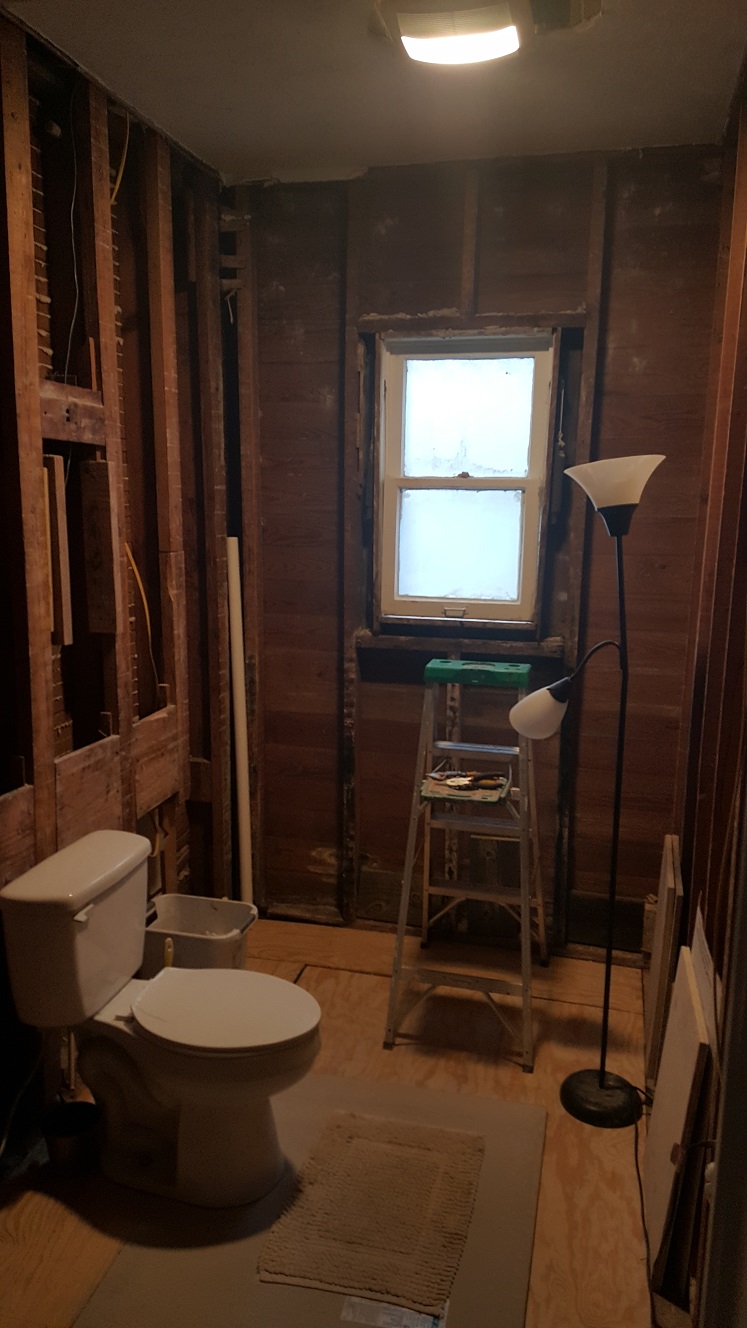
We decided to add a new pier near the old one to support the beams and added daughtered 2x6s to help increase the strength and rigidity. While it used to feel like you would fall through the floor any minute, it now feels solid with just the ¾" plywood. So were starting into the reconstruction phase of this rennovation. We decided we were going to switch the swing of the door to eliminate the wasted space in the corner behind it. There used to be a makeshift linen closet that we took out first thing. By reversing the swing of the door it would now open against the wall where the towel bars would hang, freeing up that space for Ann's pedestal sink she's always wanted.
Because we're reversing the door swing, the light and fan switches need moved to the other wall so they are not blocked by the door. Nick takes care of that and installing the new ventilation fan and timer and wiring it all up. I've already run the power from the outlet we added back when we rewired, but added another outlet close to the sink for code coverage. Nick even hooked us up with a new air conditioning duct. So by the end of New Year's Day, we have the second incarnation of the throne room.
The next day I cut a piece of plywood to act as a more permanent base for the toilet until we have all the plumbing work done and actually screw down the hardie backer board for the tile. The way I had it sitting allowed it to rock a bit and I wasn't comfortable with the potential for breakage. It was good enough for a night. Because we had the toilet off to install the new base, we were able to put the tub in place to get an idea of where it would need roughed in. From there I'm able to add stringers and somewhat rough in the new plumbing. Good enough to get an idea of where everything would go. Tomorrow our Christmas break is over and we're back to working for a living.
<< Previous | Bathroom | Demolition | Reconstruction | BathTub | Flooring | Tile | Next >>
The Tile And Drywall Removed To Reveal...